¶ Add the cutting tool
This tutorial explains the method of creating new tools in Fusion 360. Regardless of the type or size of the tool you are using, you can follow this method to add it.
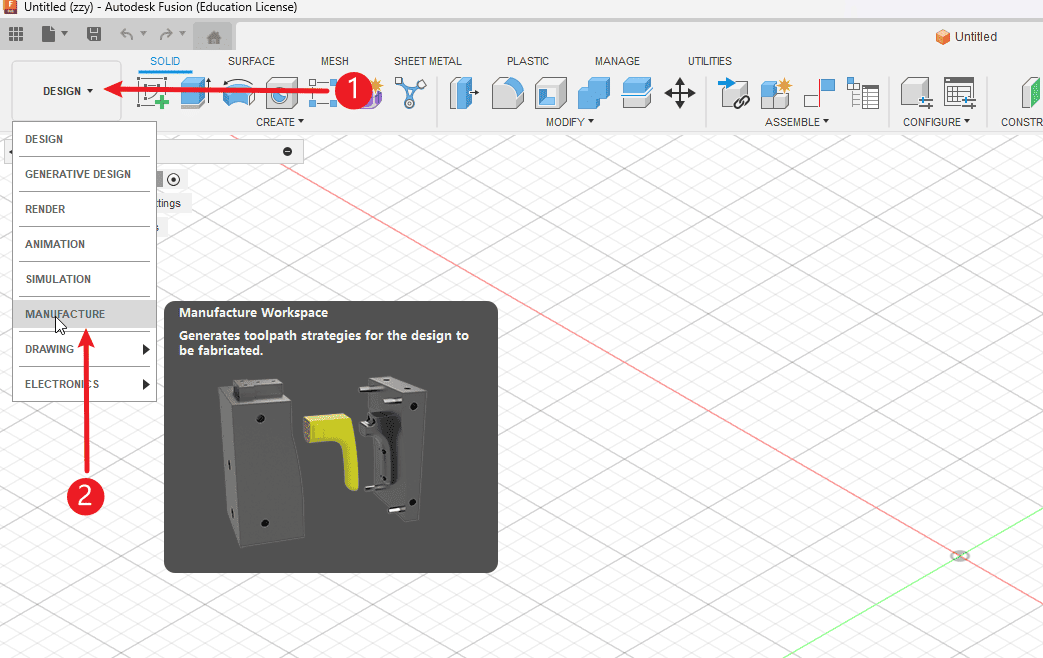
Step 1
Perform the operations according to the sequence numbers.
- 1.Click on the workbench
- 2.Switch to the CAM workbench
|
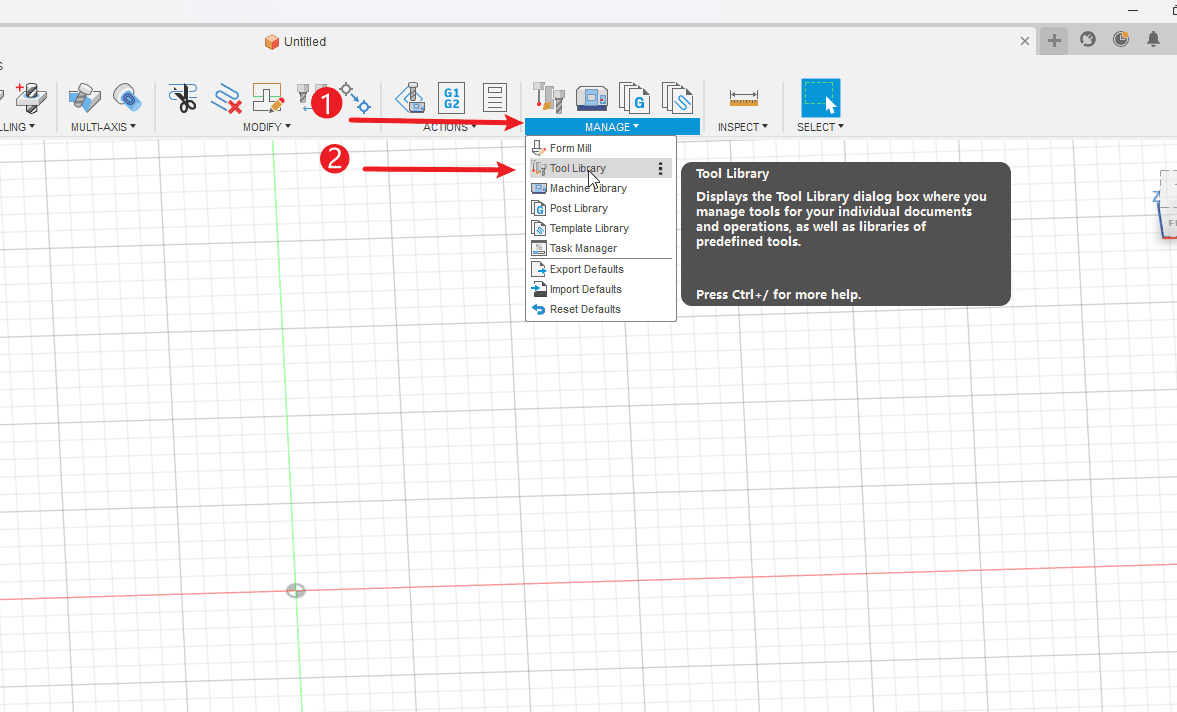
Step 2
Perform the operations according to the sequence numbers.
- 1.Click “Manage”
- 2.Click on the tool library
|
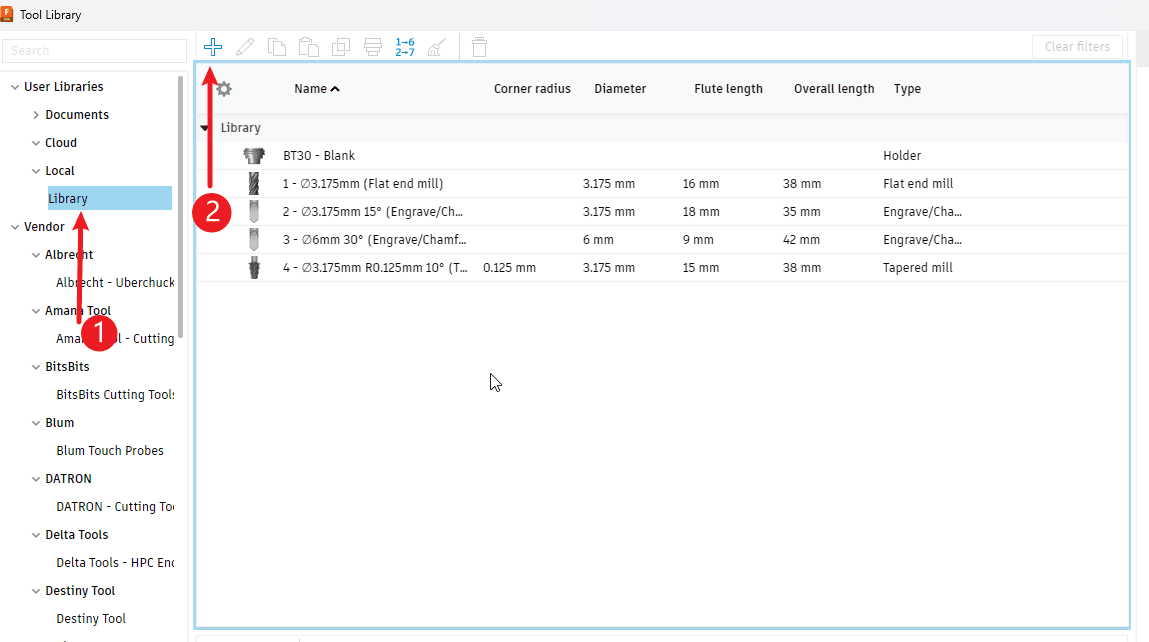
Step 3
Perform the operations according to the sequence numbers.
- 1.Click on the local area
- 2.Click to add
|
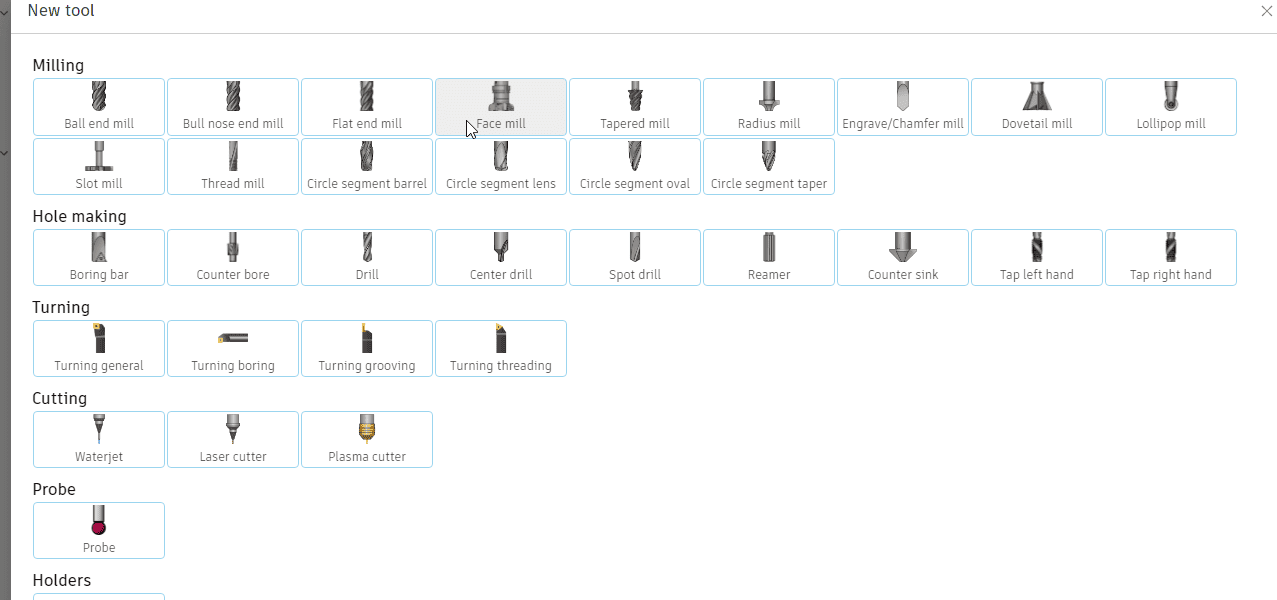
Step 4
- Select the type of tool to be added
|
Step 5
- Naming of tools

|
Step 6
Perform the operations according to the sequence numbers.
- 1.Click on the tool
- 2.Set the tool type
- 3.Set the unit of the tool, default is mm
- 4.Set the number of cutting edges of the tool
- 5.Set the length information of the tool (hovering the mouse over the parameter bar will display the corresponding information)

|
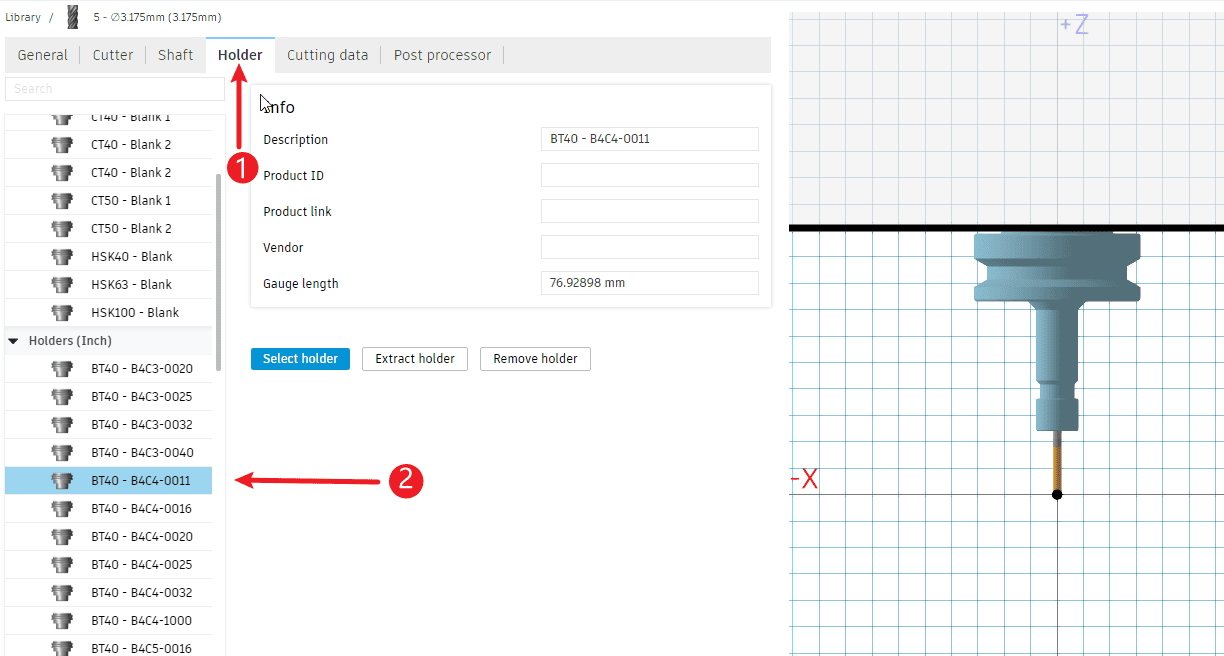
Step 7
- 1.Click the chuck
- 2.Just select a chuck (here, you can choose the same one)
|
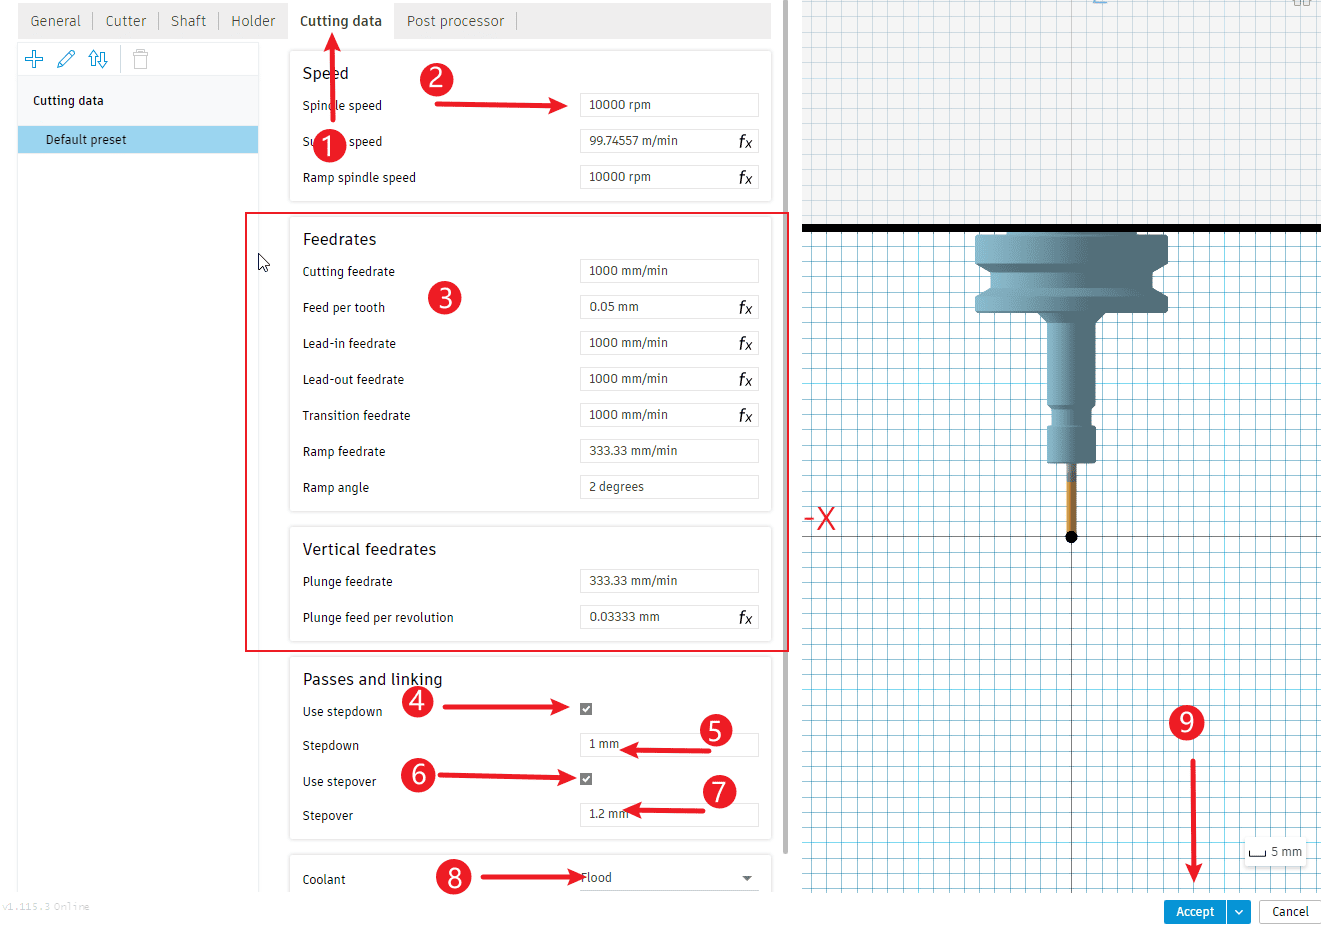
Step 8
Perform the operations according to the sequence numbers.
- 1.Click on the cutting data
- 2.Set the spindle speed (default 10000 is sufficient, representing full power)
- 3.Set the cutting speed (Note: Here, it needs to be converted according to the maximum speed of the existing machine. Do not input directly as shown in the diagram.)
- 4.Check the option for using the cutting step distance
- 5.Set the stroke distance for a single cut
- 6.Check the option for using step distance
- 7.Set the line spacing for each stroke
- 8.Disable coolant
- 9.Click “OK” to complete the addition of the tool.
|