¶ How to create 3D relief sculptures
This video tutorial explains the method of creating reliefs using the Carveco software.
**Learning Suggestions:**To better master the skills of relief sculpture, we recommend that you first learn the following basic contents:
Tutorial on Tool Creation and Configuration
2D Plane Sculpting Tutorial
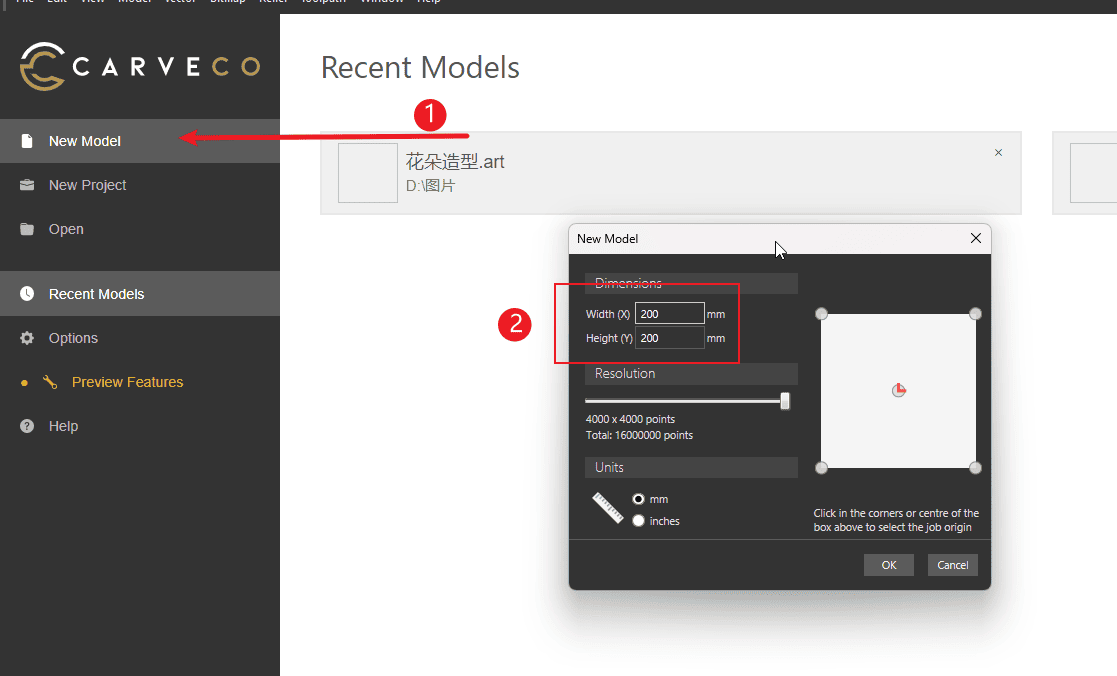
Step 1
Perform the operations according to the sequence numbers.
- 1.Create a new project
- 2.Set the size of the relief to be carved (
Note: The size here should be slightly smaller than the size of the used board, leaving space for the fixation of the press plate)
|
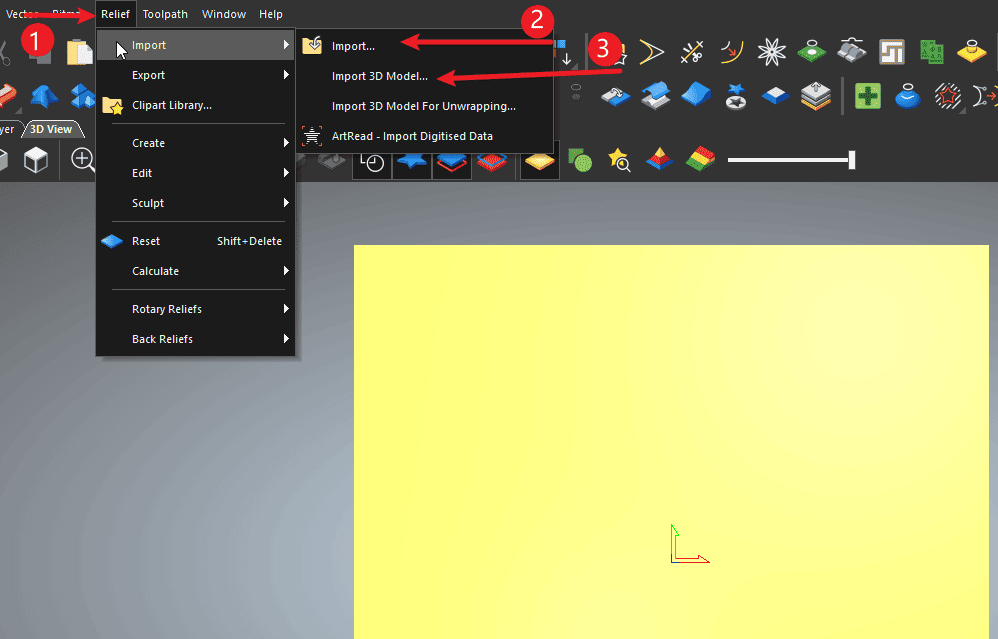
Step 2
Perform the operations according to the sequence numbers.
- 1.Click on the relief.
- 2.Click “Import”, then select the file type for import (you can use grayscale images or STL files)
- 3.Click to import 3D file
|
Step 3
Perform the operations according to the sequence numbers.
- 1.Set the model at the position of the sheet material.
- 2.Adjust the size of the model
- 3.Click and paste

|
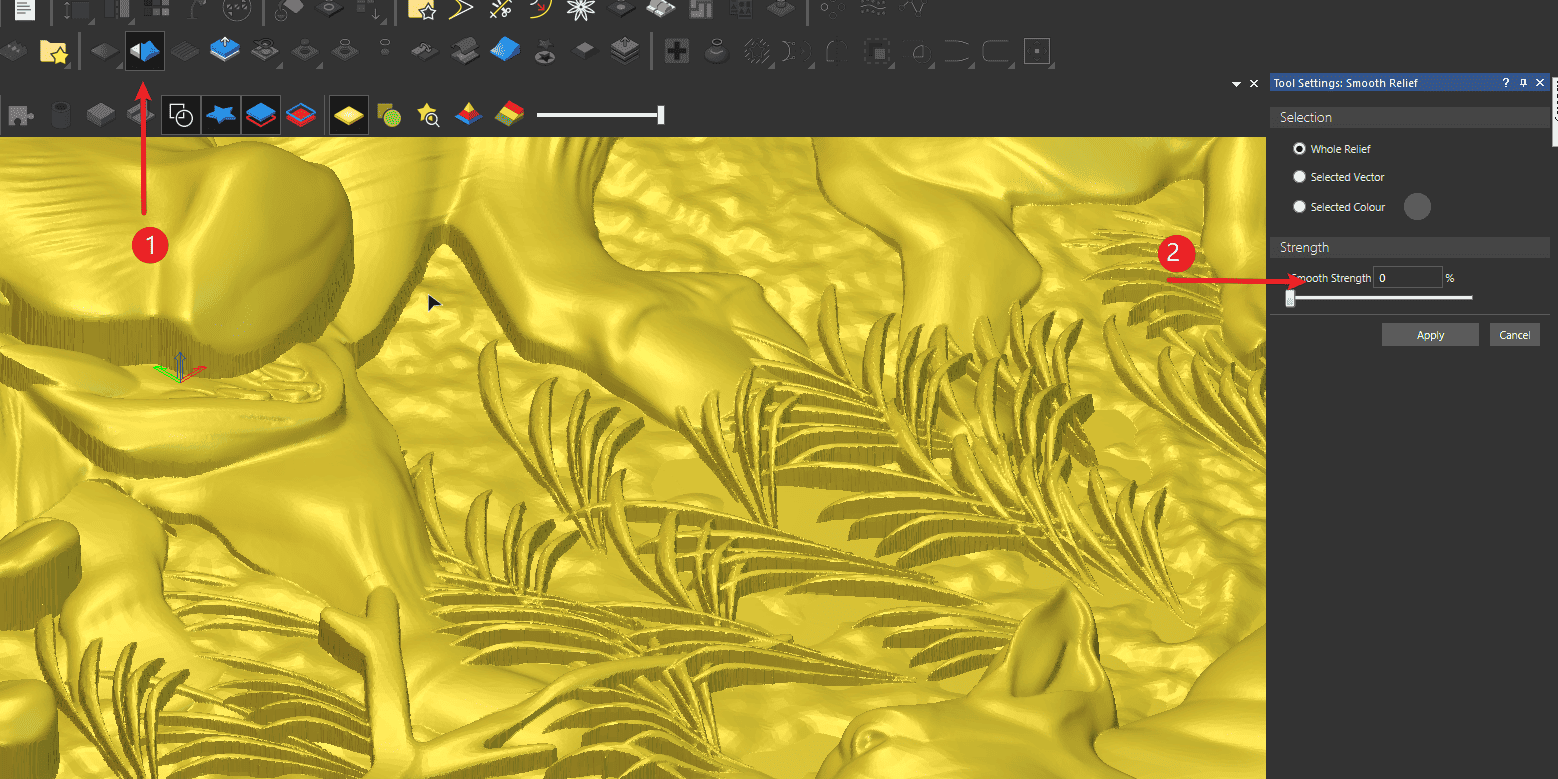
Step 4
Perform the operations according to the sequence numbers.
- 1.Click on the smooth relief texture
- 2.Adjust the degree of smoothness
|
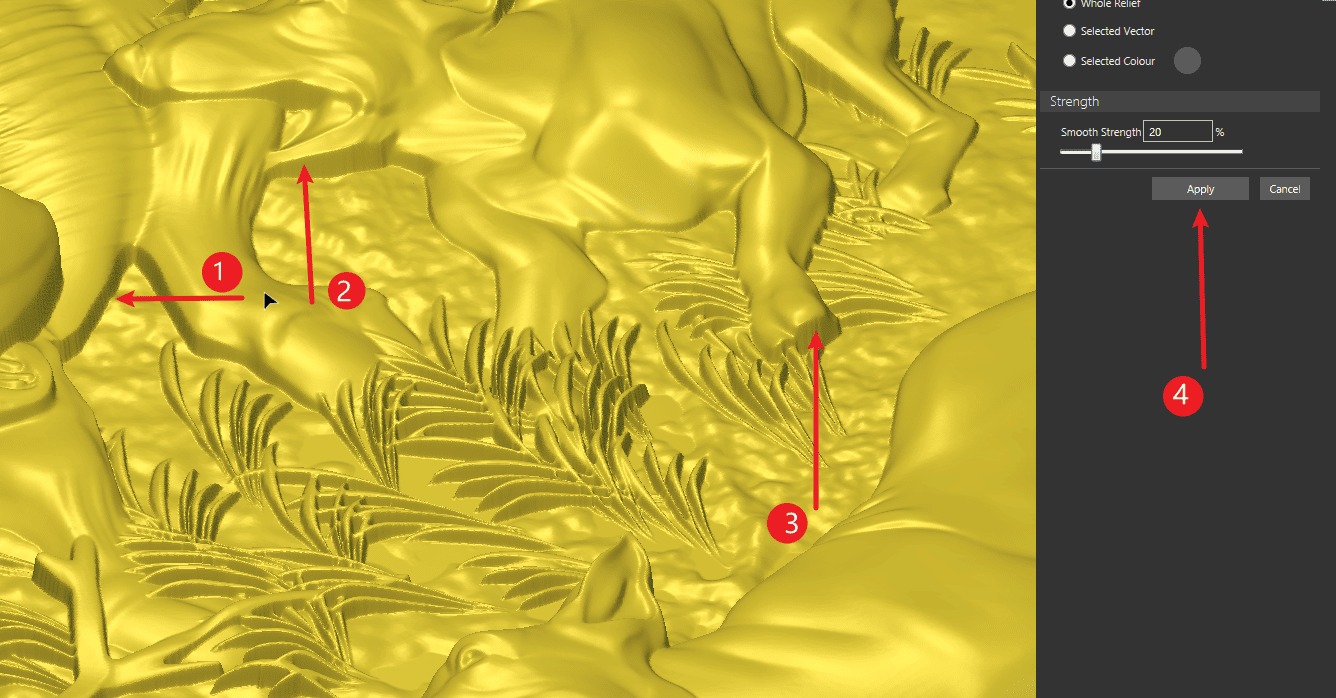
Step 5
Perform the operations according to the sequence numbers.
- 1-3.Check if the edges of the relief height are smooth
- 4.Click to apply.
|
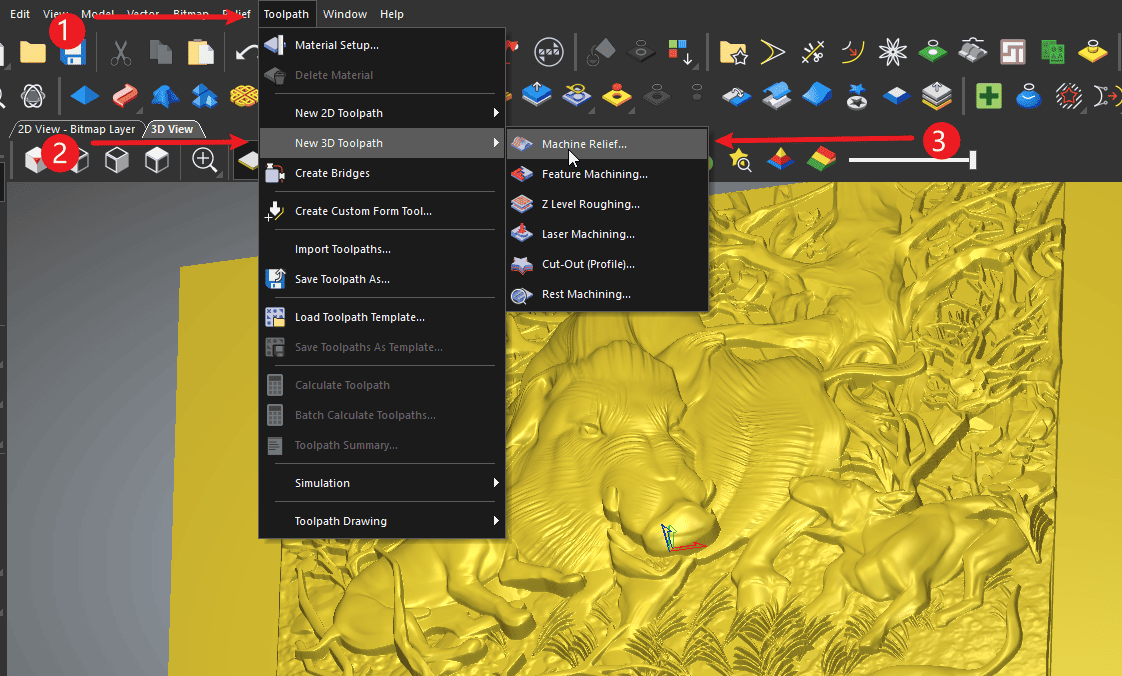
Step 6
Perform the operations according to the sequence numbers
- 1.Click path
- 2.Click on the 3D path
- 3.Click on the relief sword path
|
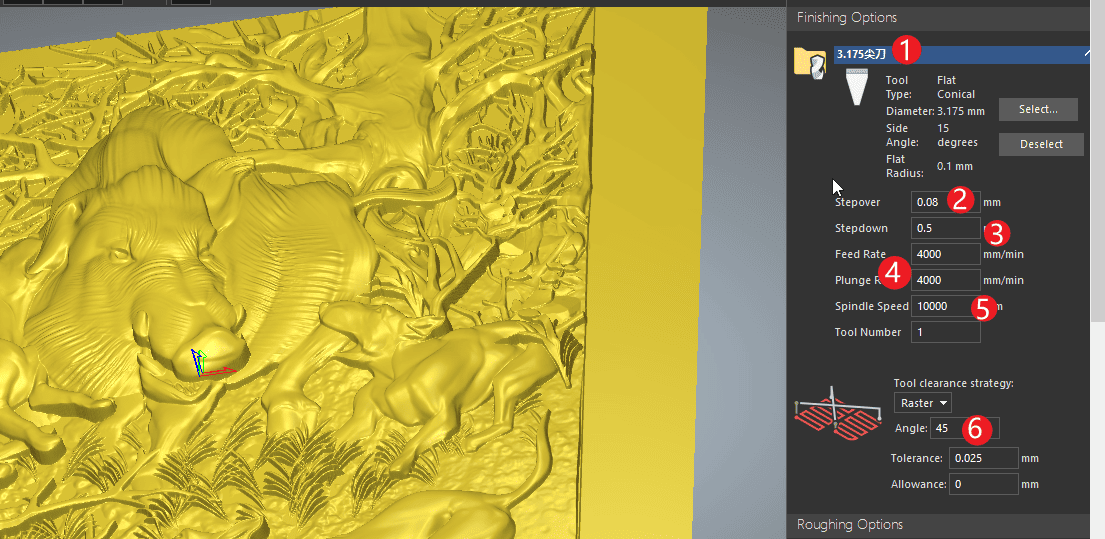
Step 7
Perform the operations according to the sequence numbers.
- 1.Click to add finely processed cutting tools
- 2.Set the distance between each row of the fine processing tool path
- 3.Set the clearance for fine processing removal
- 4.Set the feed speed and the retraction speed (note that here you need to convert according to the maximum speed of the existing machine. Generally, 80% should be used. Do not directly input as shown in the diagram.)
- 5.Set the spindle speed
- 6.Set the angle for the fine processing movement
|
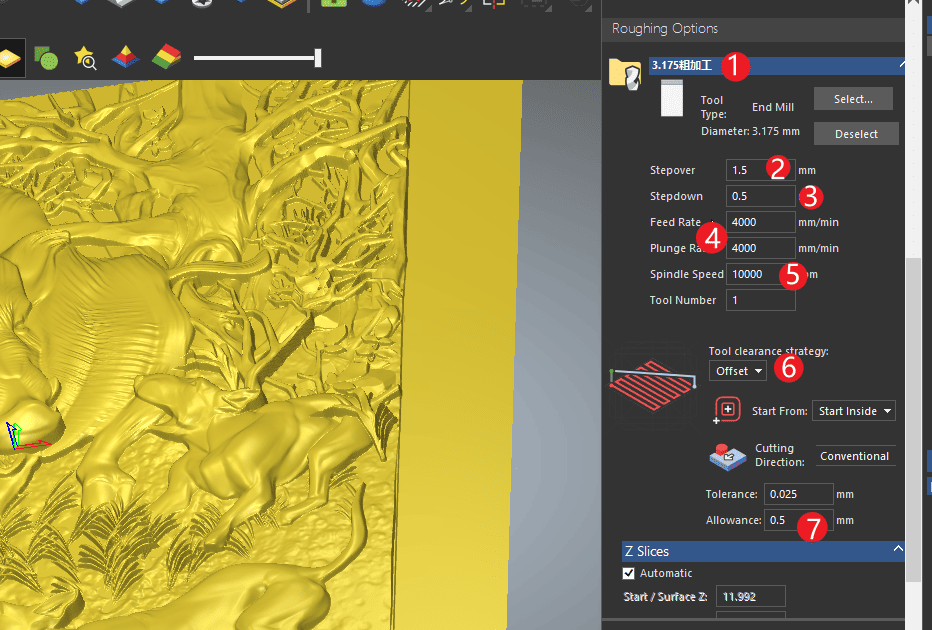
Step 8
Perform the operations according to the sequence numbers.
- 1.Click to add rough-cutting tools
- 2.Set the distance between each row of the rough machining path
- 3.Set the depth of each cut for rough processing
- 4.Set the feed speed and the retraction speed (note that here you need to convert according to the maximum speed of the existing machine. Generally, 80% should be used. Do not directly input as shown in the diagram.)
- 5.Set the spindle speed
- 6.Select the movement mode of the cutting path
- 7.Choose to leave a 0.5 margin for the finishing process.
|
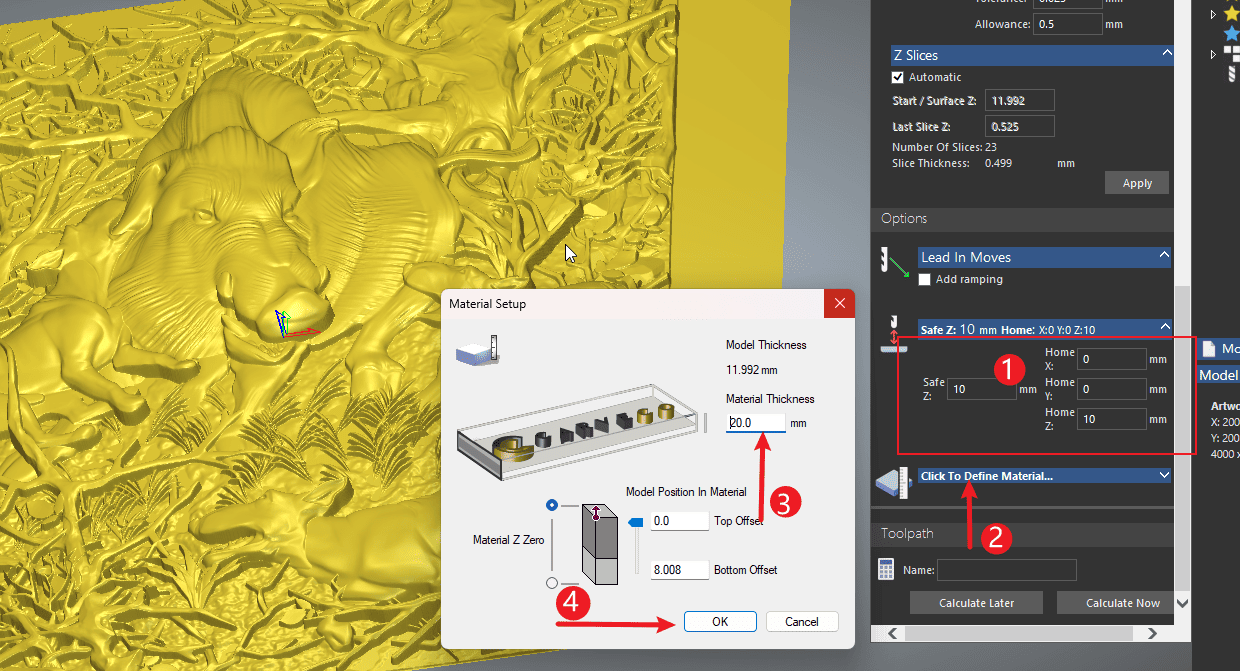
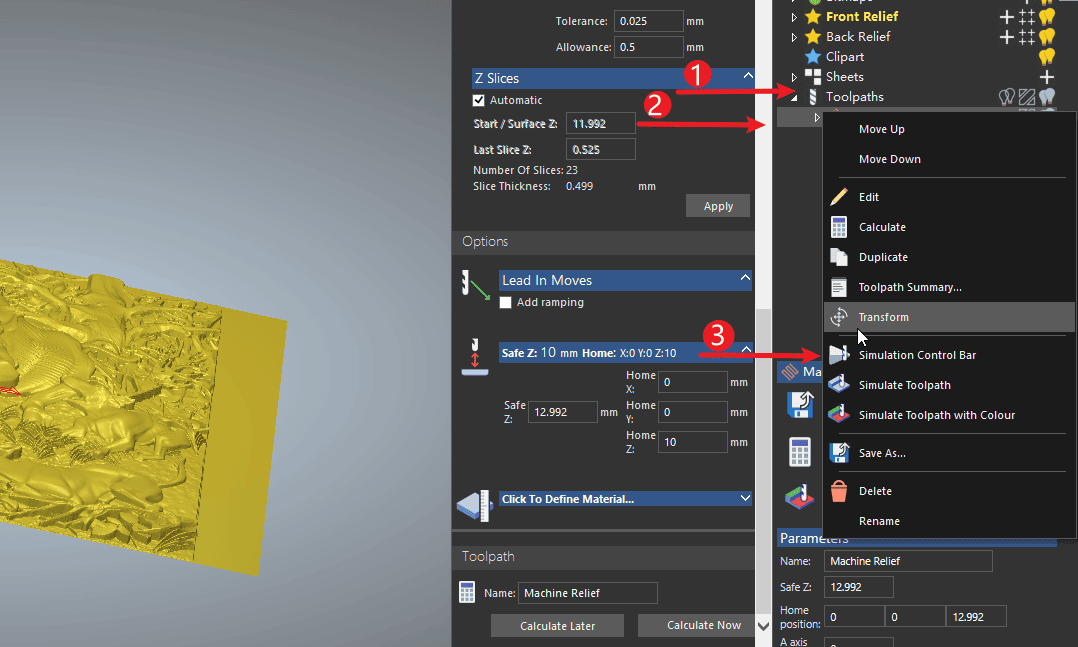
Step 9
Perform the operations according to the sequence numbers.
- 1.Set the safe height of Z
- 2.Click on “Material Settings”
- 3.The thickness of the used materials
- 4.Click “OK”
|
Step 10
- 1.Click path
- 2.Right-click tool path
- 3.Click simulation
|
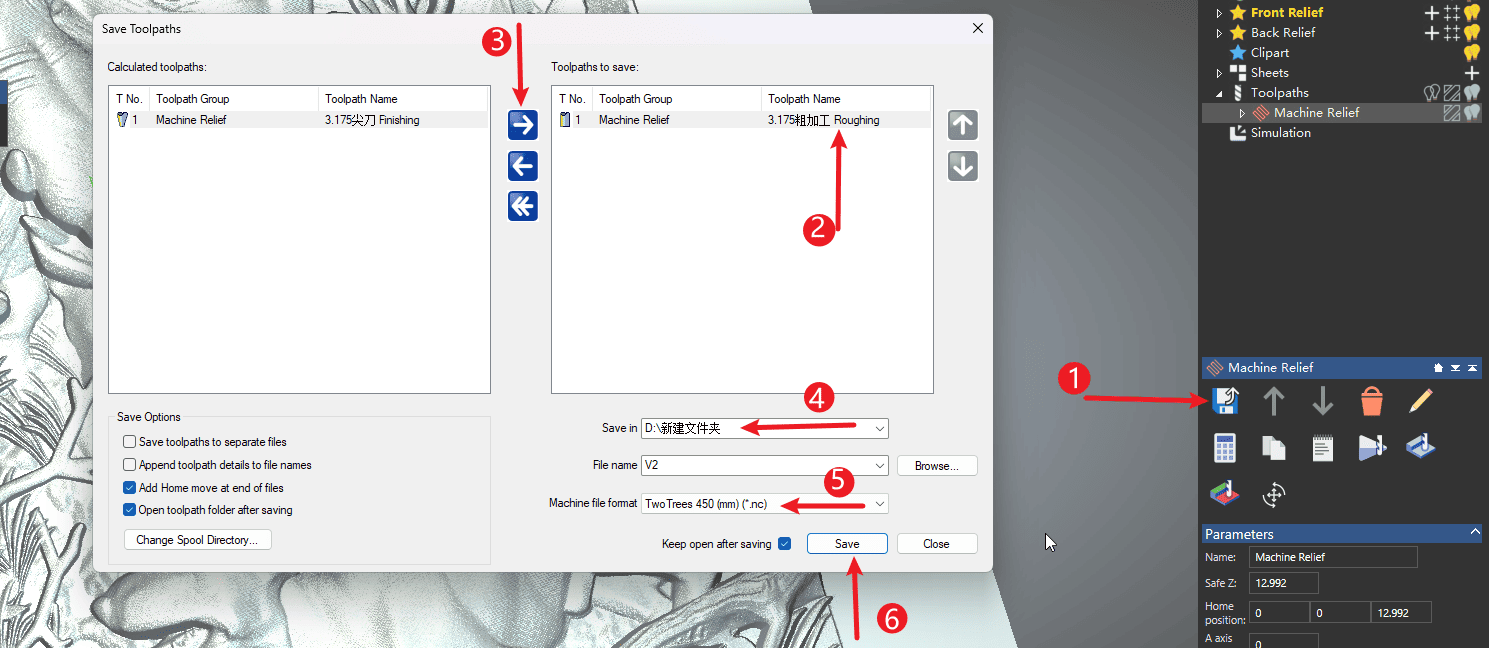
Step 1
- 1.Click to save the cutting path
- 2.Select the export path
- 3.After saving one path, switch to another tool path save (for engraving, the file needs to be saved as two nc files)
- 4.Select the export folder
- 5.Select the post-processing program (this post-processing is applicable to all Twotrees machines)
- 6.Just click “Save” to proceed.
|