¶ Carving execution
This tutorial explains the steps to perform the carving after completing the preparatory work.
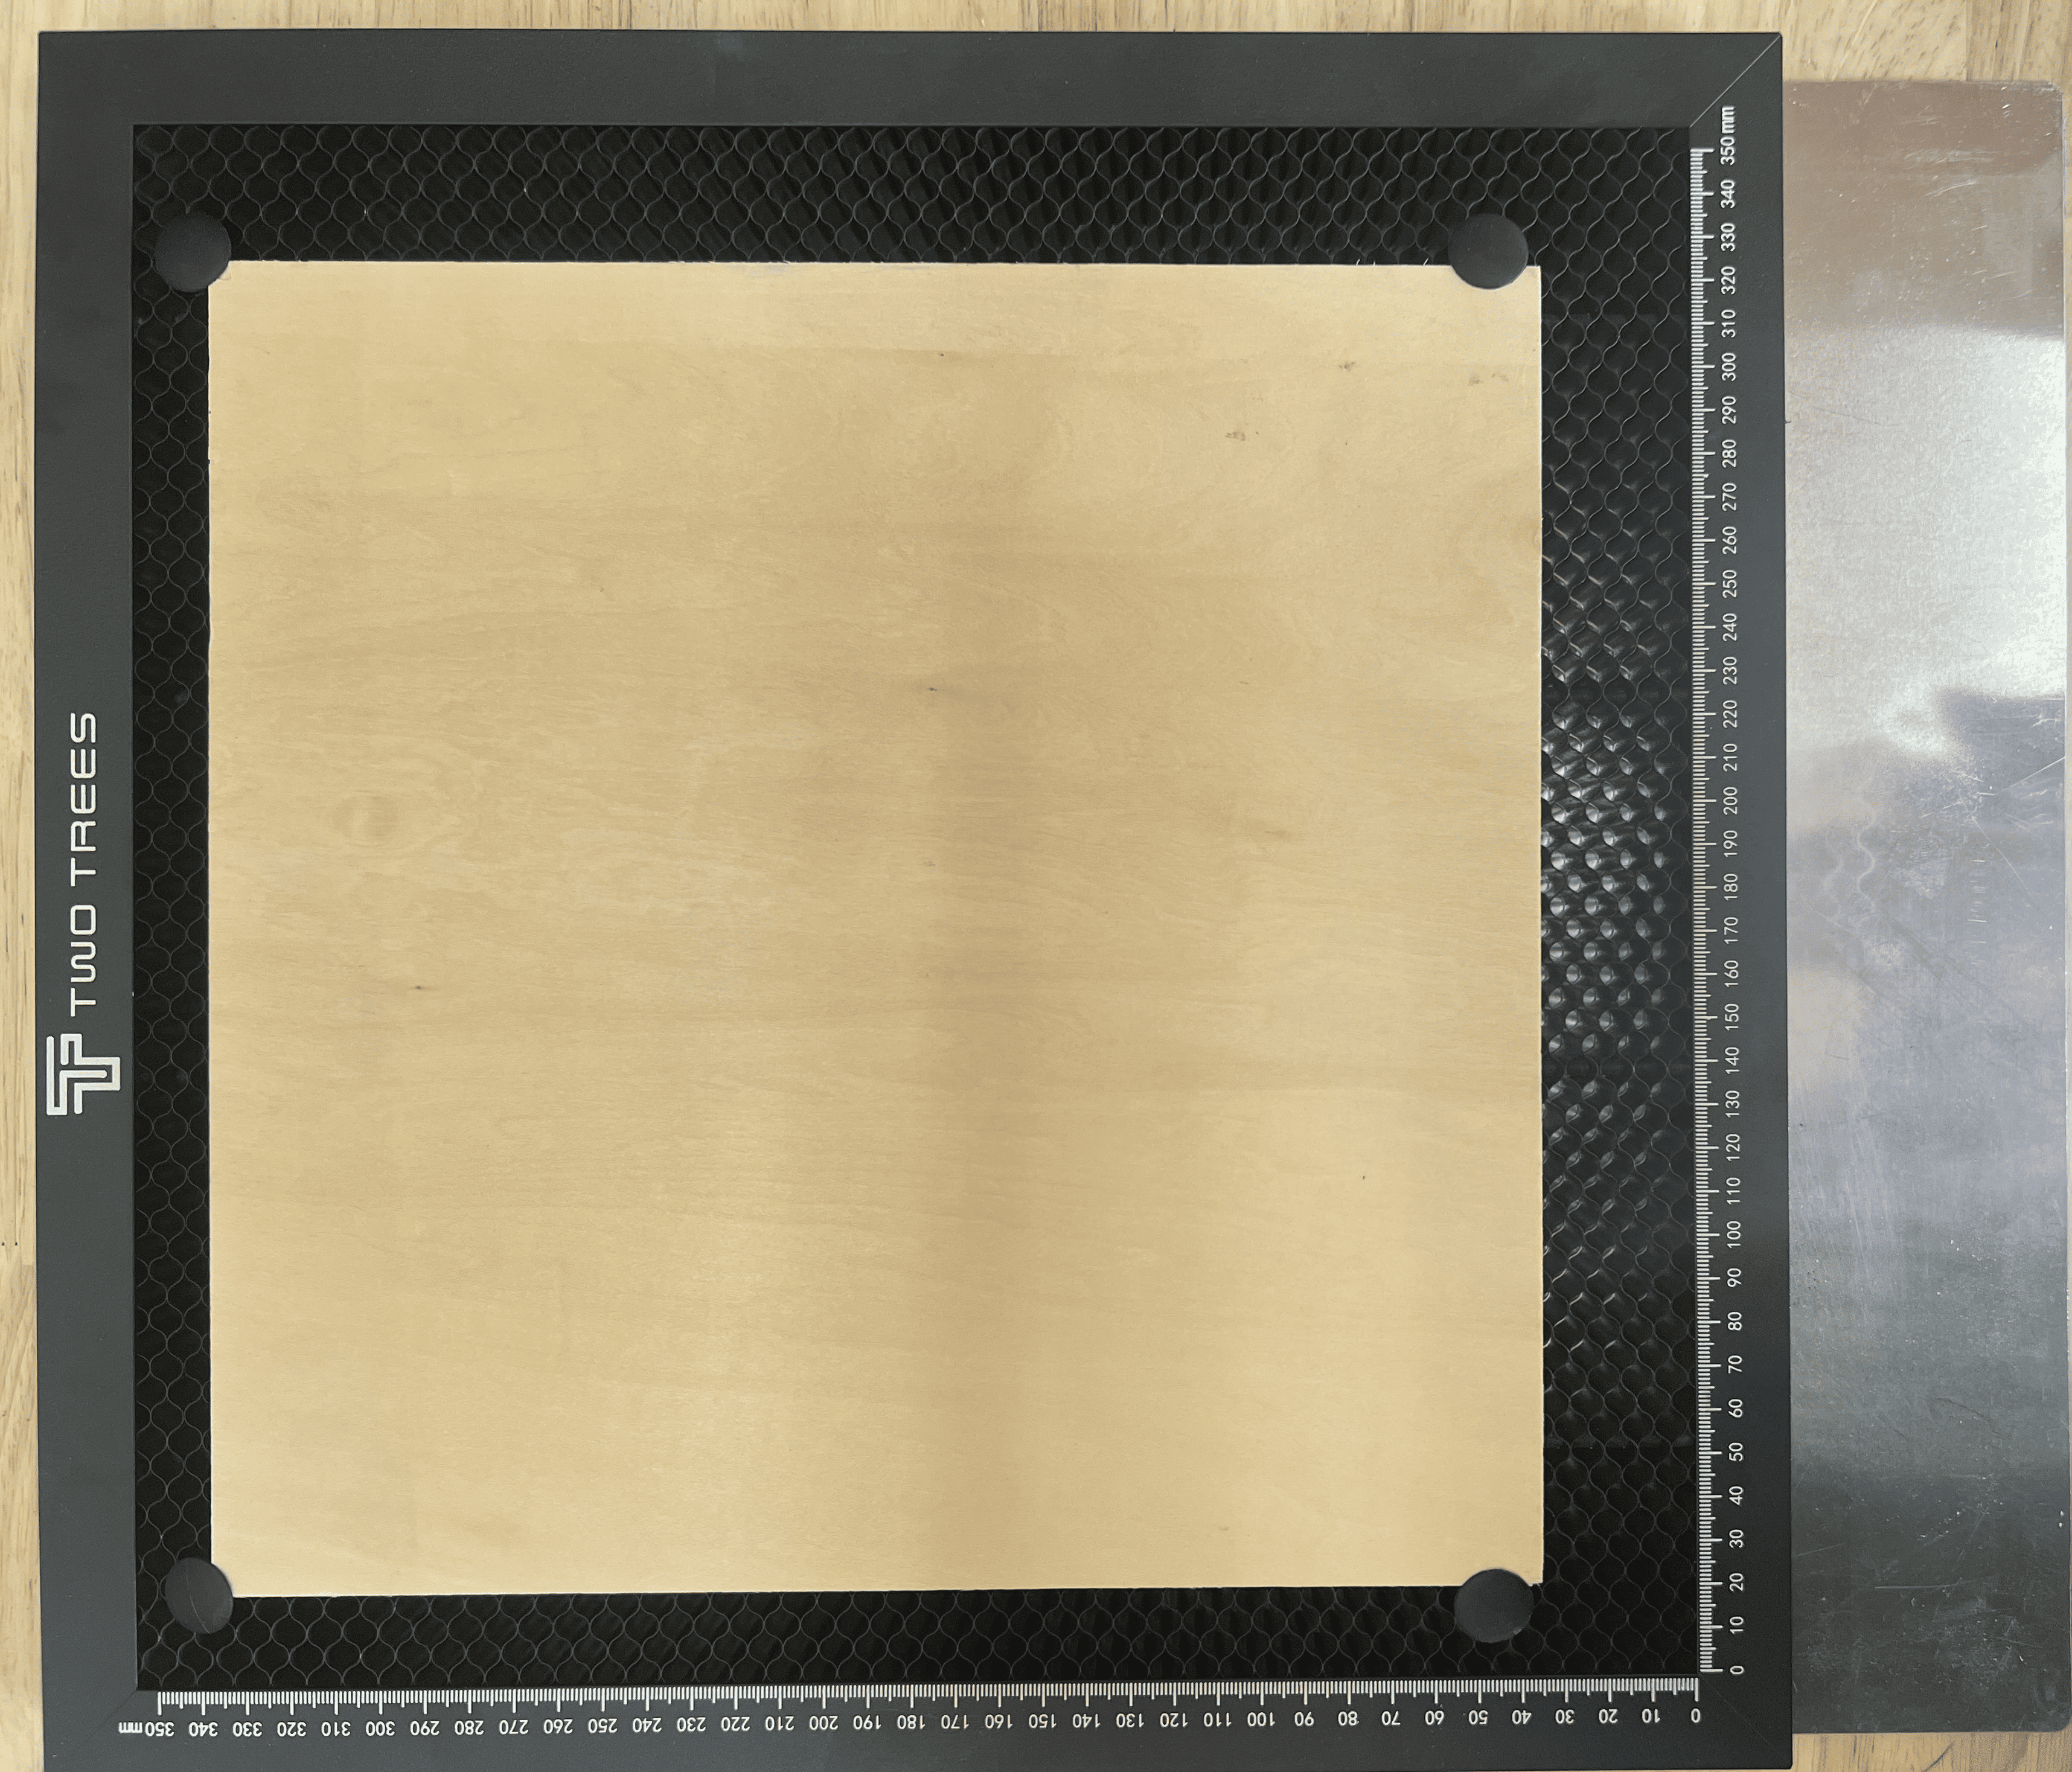
¶ Place material
- Place the plate to be engraved on the honeycomb board and fix it with press nails to prevent it from moving. Place a frosted aluminum plate under the honeycomb board to protect the tabletop.
|
¶ Focusing
TTS-55Pro-10ProFocusing schematic diagram

TTS-20Pro
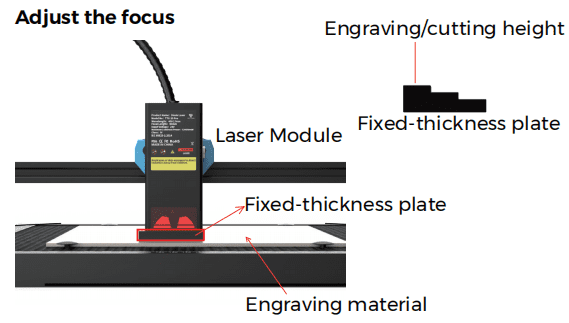
¶ Focus Calibration Before Engraving
Properly adjusting the focus before laser engraving is crucial to ensuring the quality of the engraving. Here are the detailed steps to adjust the focus:
-
Prepare the Focusing Post:
- The focusing post is a tool to assist in adjusting the laser focus, which usually has multiple scale steps, each corresponding to a different height.
-
Place the Focusing Post:
- Place the focusing post between the surface of the engraving object and the machine’s adjustment block, ensuring that the focusing post is stable and perpendicular to the worktable.
-
Adjust the Z-Axis Lift Module:
- Operate the Z-axis lift module, which is typically done through the machine’s control panel or software interface.
- Slowly adjust the Z-axis until the laser head descends and makes contact with the first step of the focusing post.
-
Precise Focusing:
- When the laser head makes contact with the first step of the focusing post, stop further descent.
- At this point, the laser focus should be exactly on the surface of the engraving object.
-
Conduct a Test:
- Before starting the actual engraving, it is recommended to do a test to ensure the accuracy of the focus.
- Observe the size and clarity of the laser spot on the object’s surface, and make minor adjustments to the Z-axis position if necessary.
-
Safe Operation:
- Throughout the adjustment process, ensure to follow all safety guidelines and wear appropriate protective equipment, such as laser safety goggles.
¶ engraving
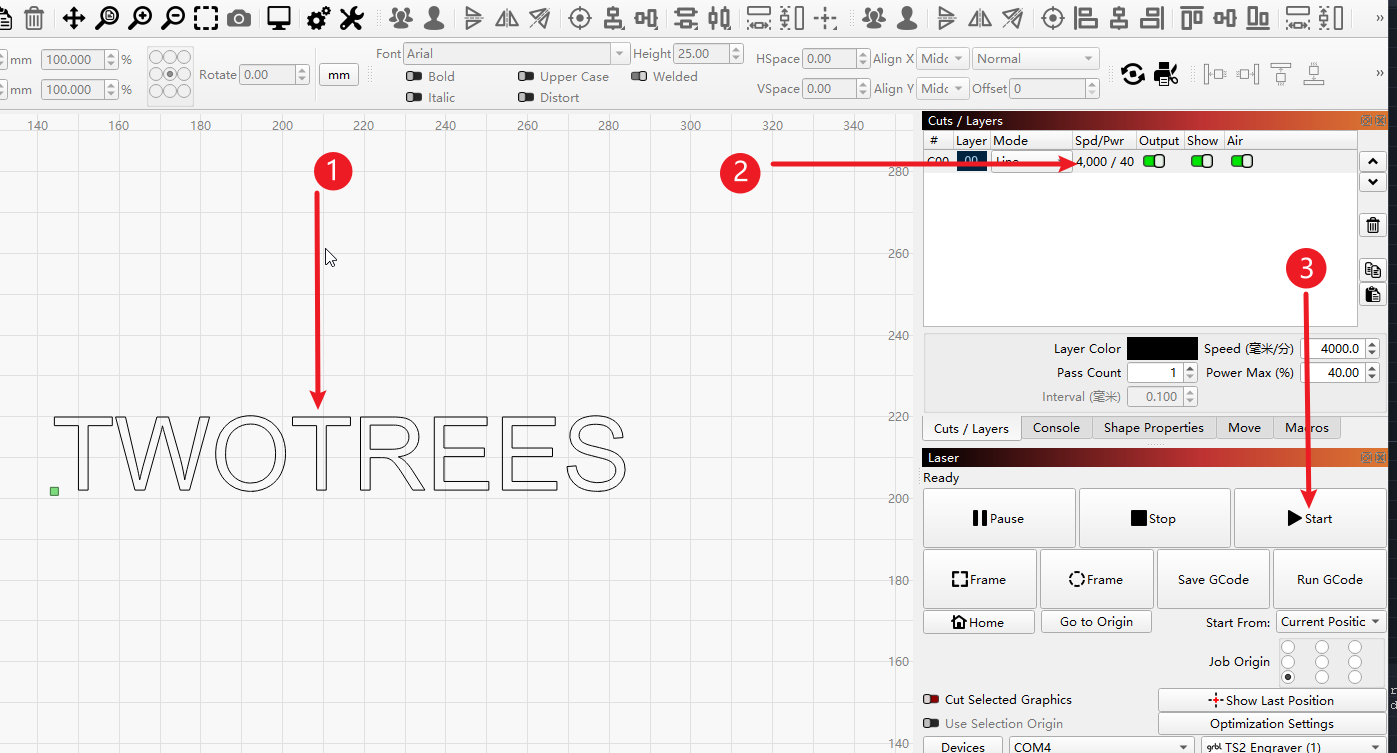
LightBurn
- 1.Setting up the graphics file
- 2.Set the engraving speed and power of the material to be used
- 3.Click to run engraving
|
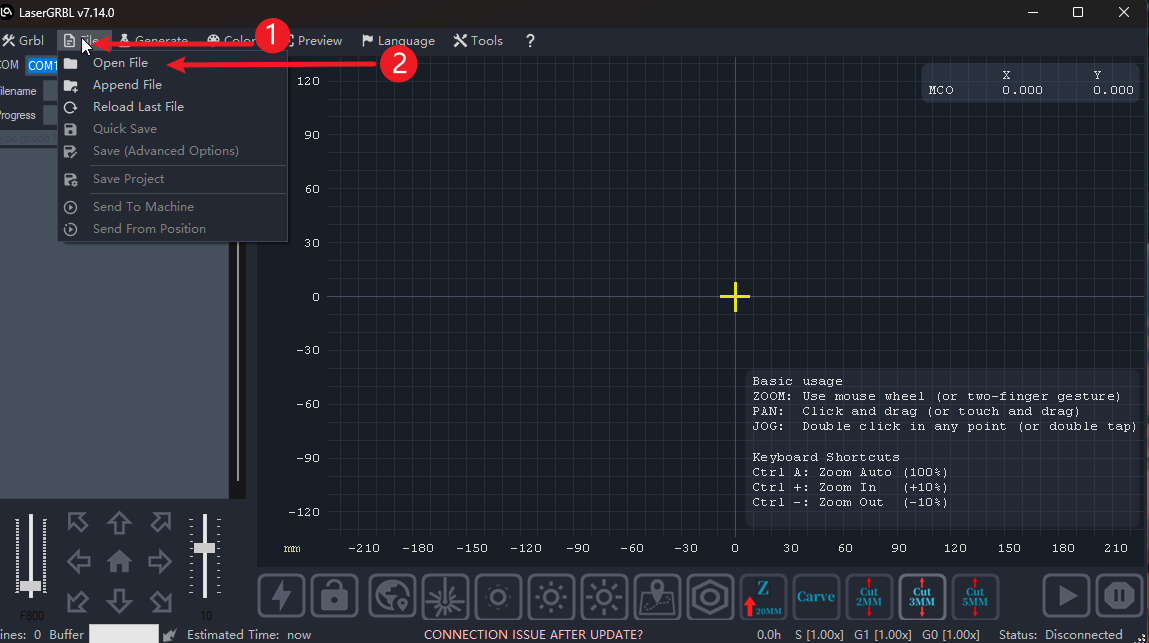
LaserGRBL
Operate by sequence number
- 1.Click File
- 2.Click to open the file
|
- 1.Select the file you want to engrave
- 2.Click to open

|
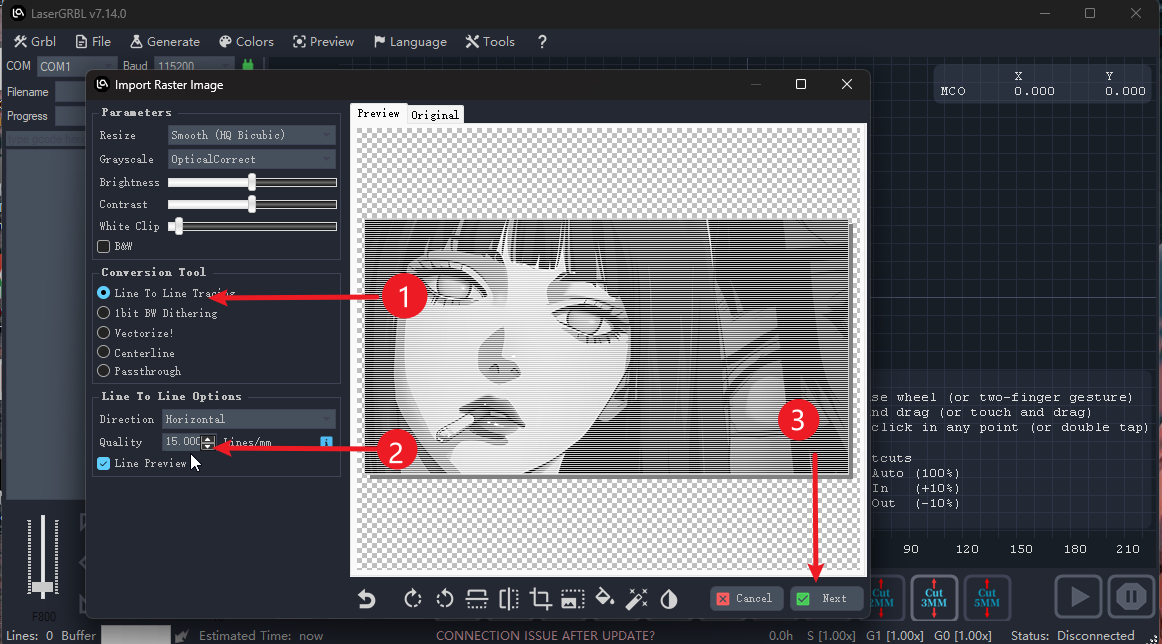
- 1.Set up the mode you want to use
- 2.Set the engraving quality (this value means how many lines are engraved within a 1mm spacing)
- 3.Click Next
|
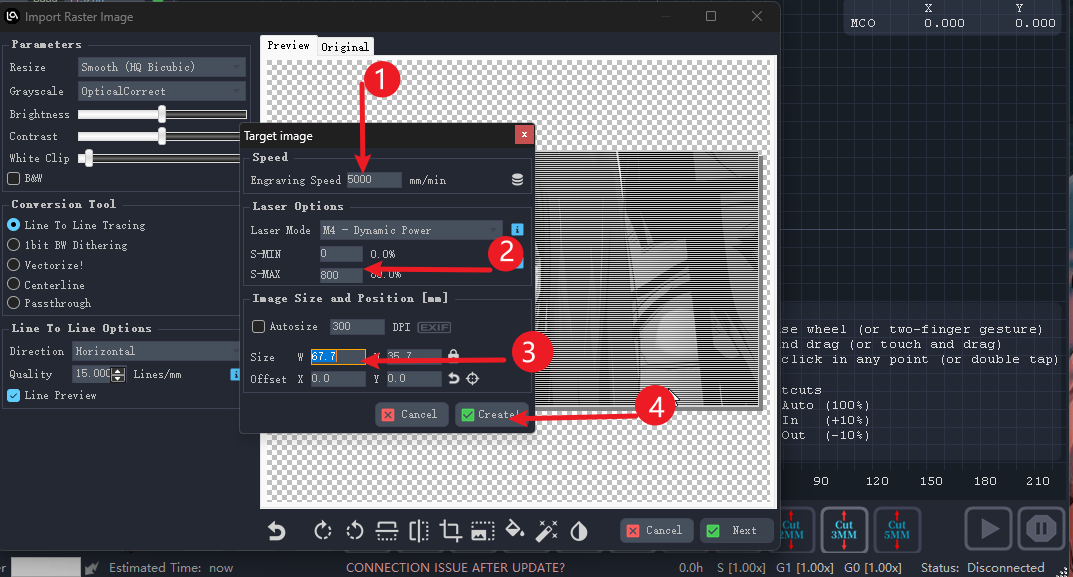
- 1.Set the engraving speed
- 2.Set the power you want to use (1000 represents 100% power)
- 3.Set the size of the image
- 4.Click Finish
|
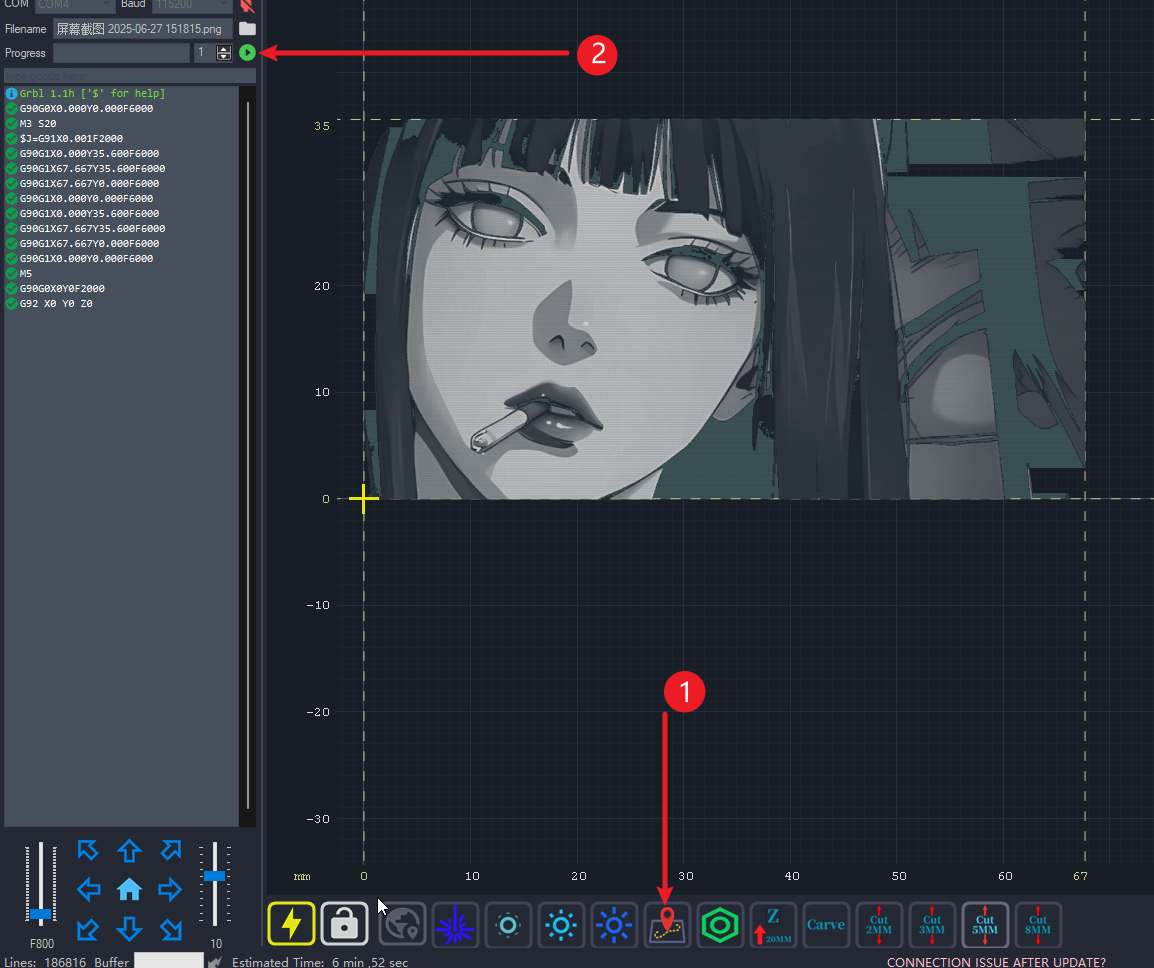
- 1.After setting the graphic file, click on the origin
- 3.Click to run engraving
|