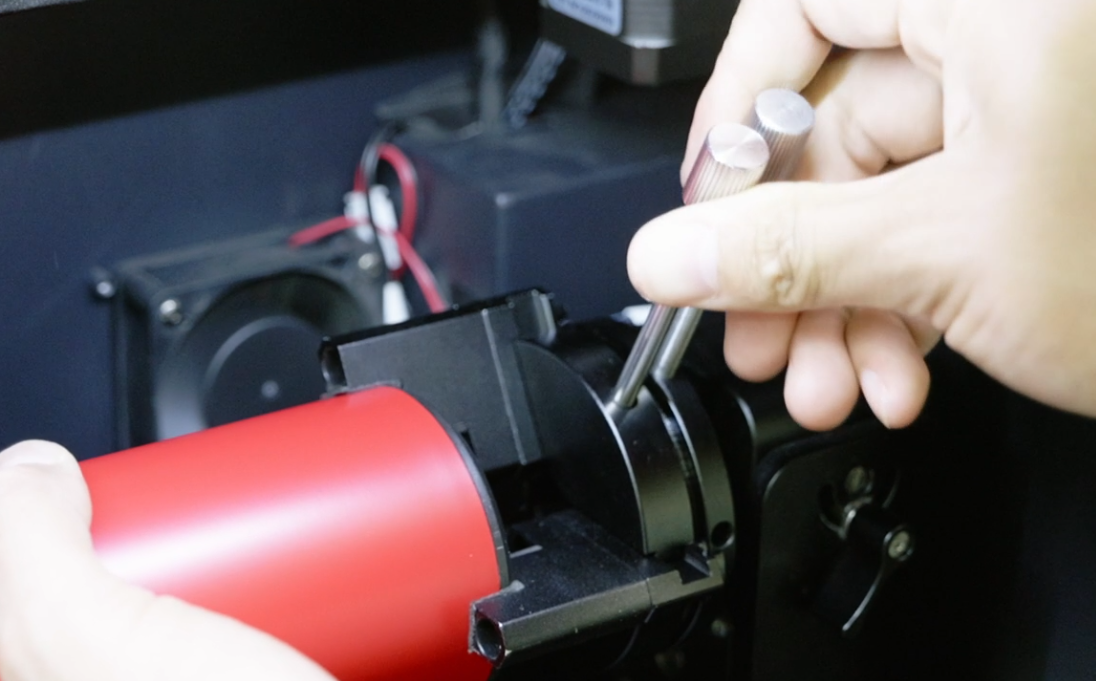
- 1.Use a pin to fix the cup onto the gripper.
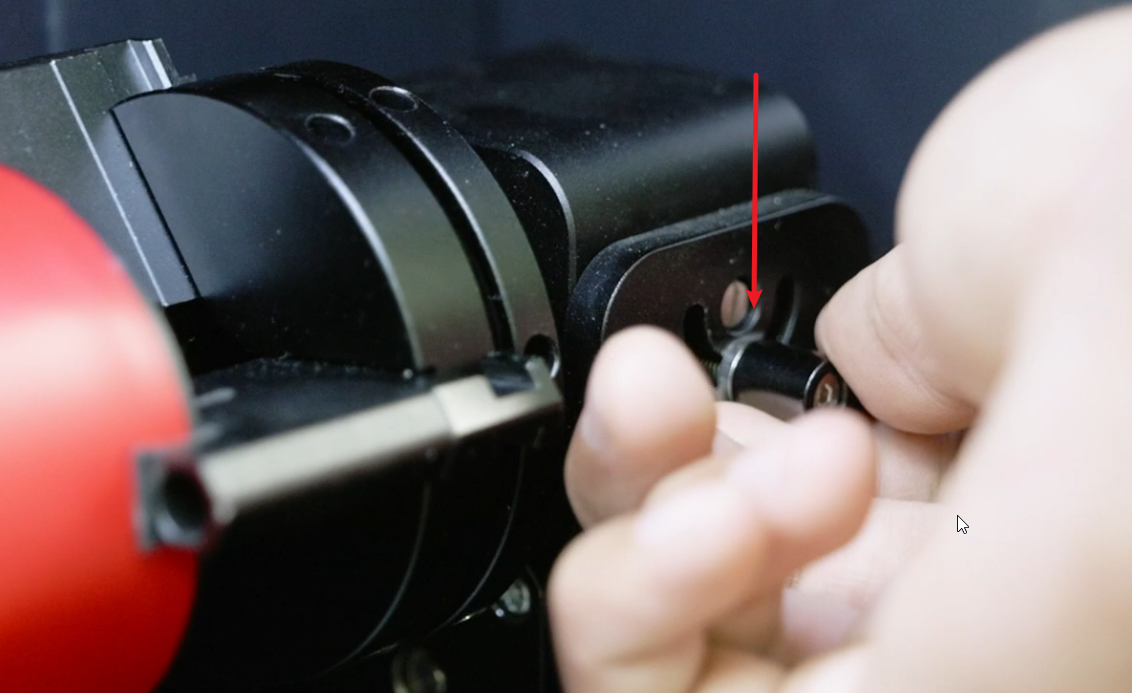
- 2.Adjust the knob on the clamping claw base to adjust the levelness of the cup.
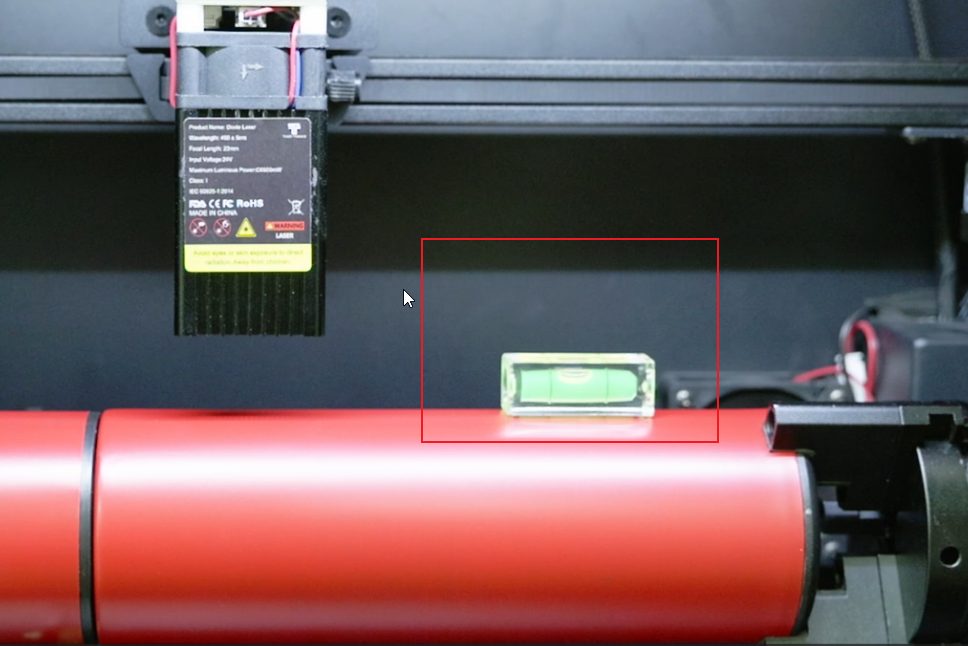
- 3.Use the included level ruler to gradually adjust the levelness of the cup.
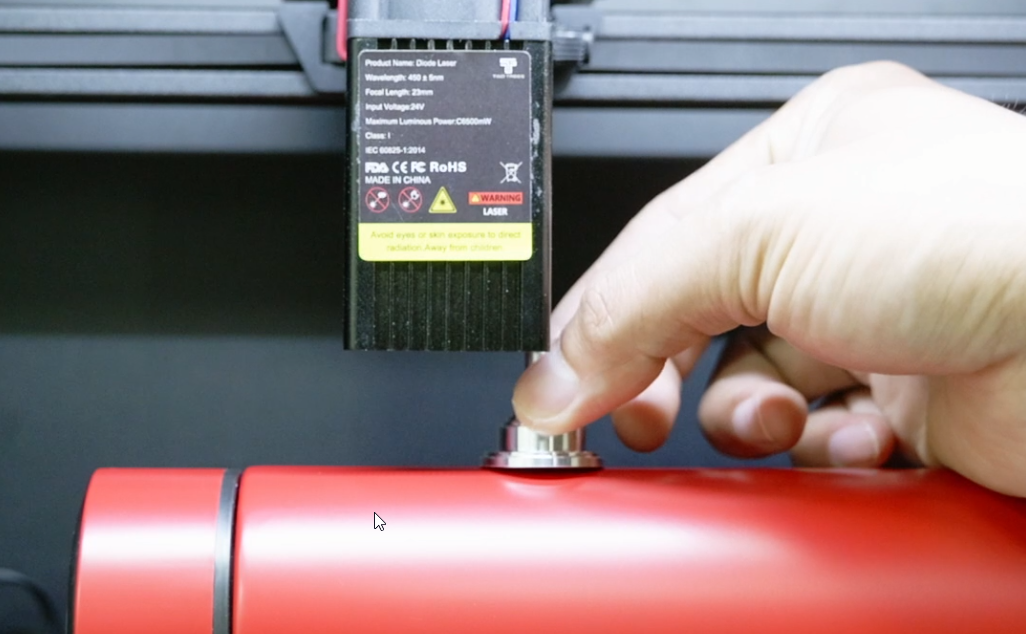
- Use the focusing bar for focusing.
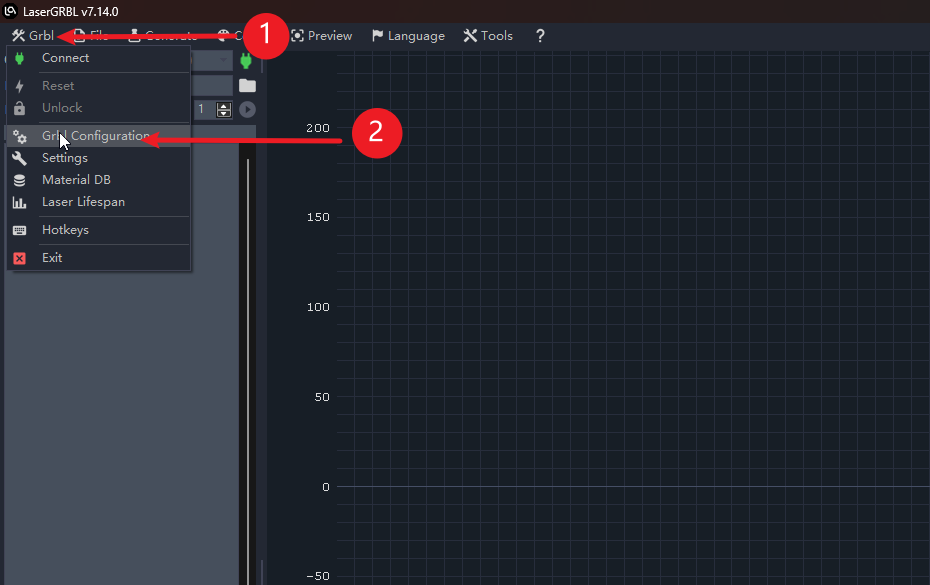
- 1.1.Click on GRBL
- 1.2.Click on GRBL configuration to enter the firmware configuration.
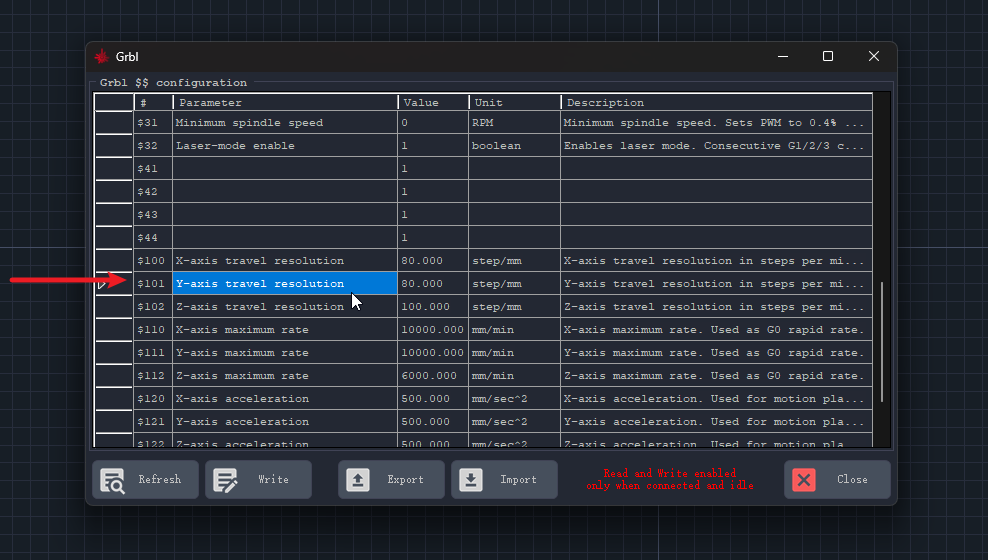
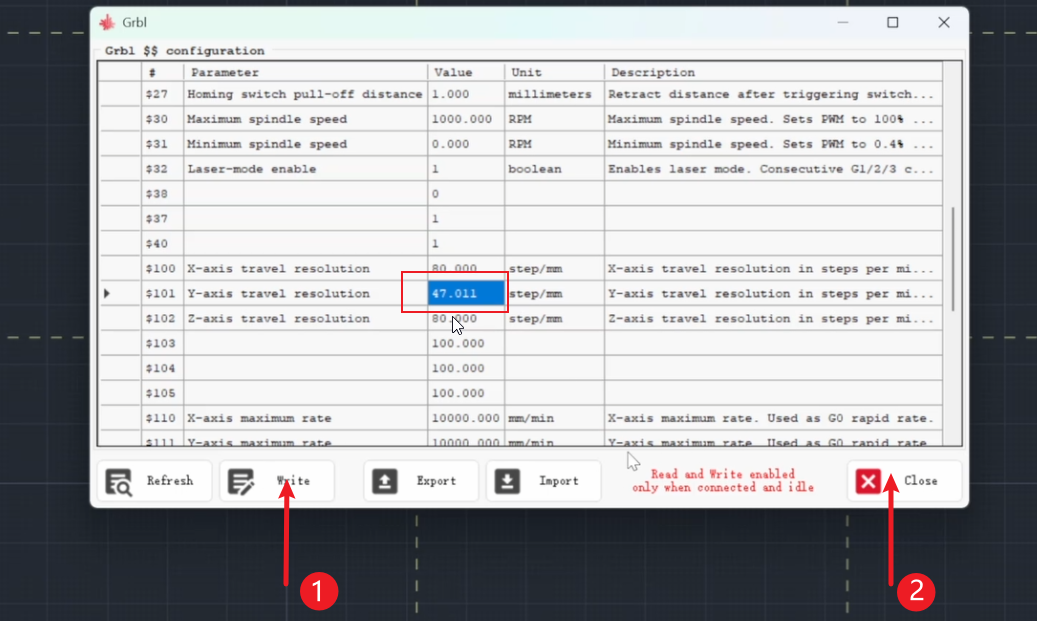
- 2.Find $101 (this value is the step value on the Y-axis)
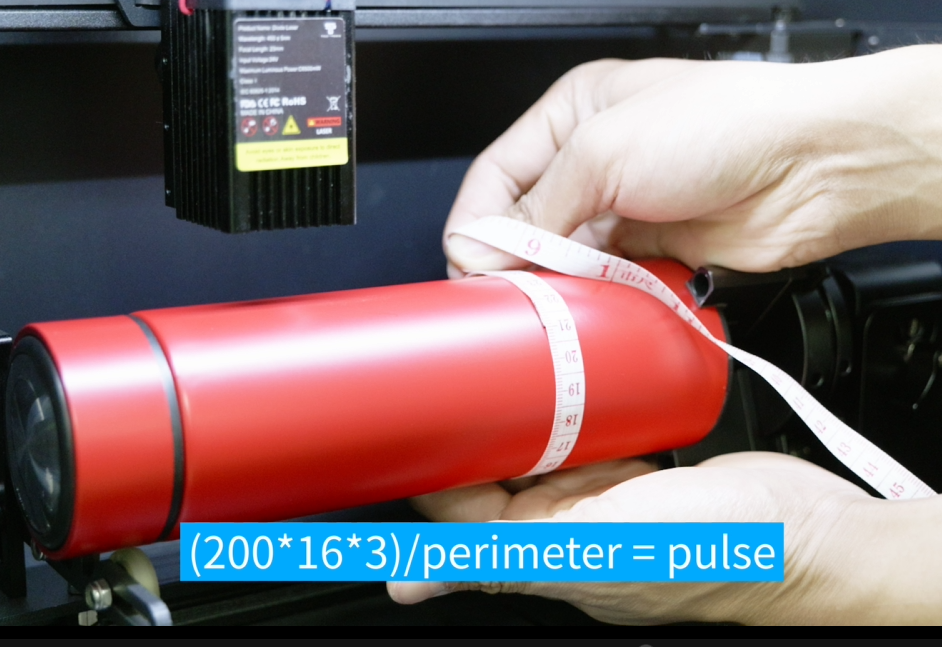
- 3.Use the included tape measure to measure the circumference of the cup.
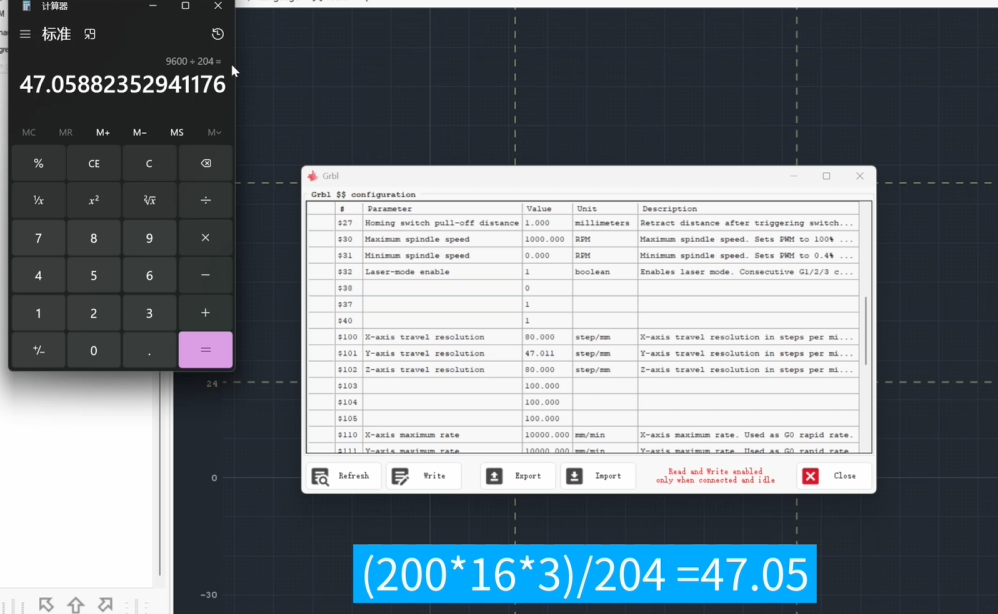
- 4.According to the formula (200x16x3) / perimeter = step value, calculate the corresponding step value.
- 5.1.Input the calculated step value into the “101” column and click “Write”.
- 5.2.Just close the configuration page again.
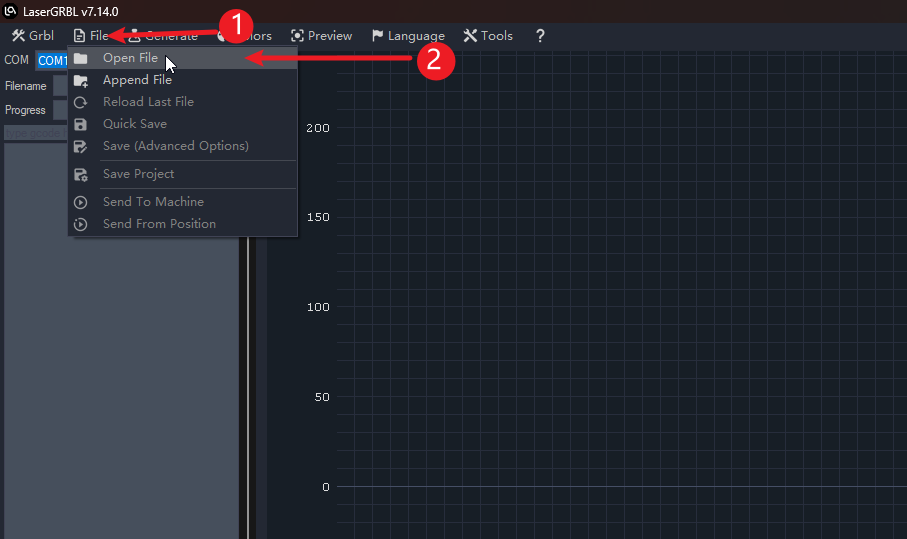
- 1.1.Click on the file
- 1.2.Click to open the file
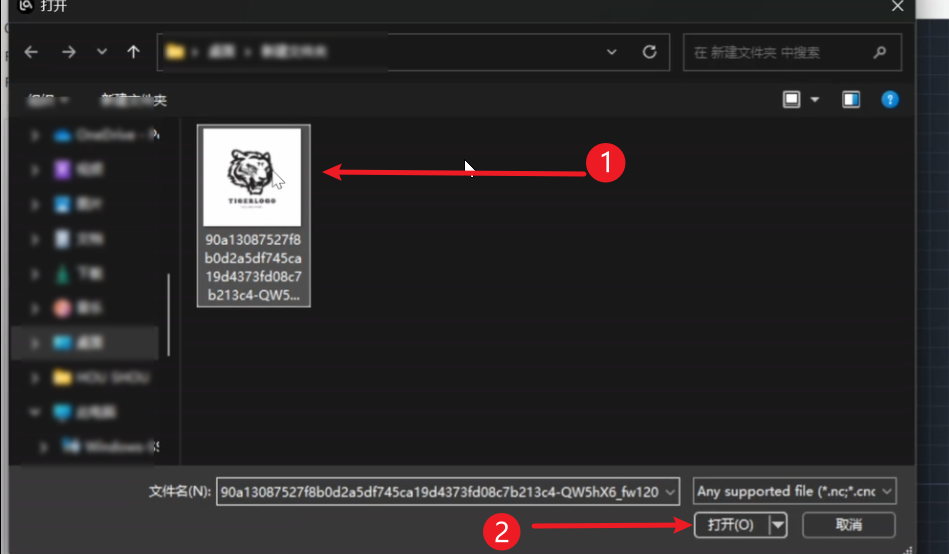
- 2.1.Select the image that needs to be engraved
- 2.2.Click to open
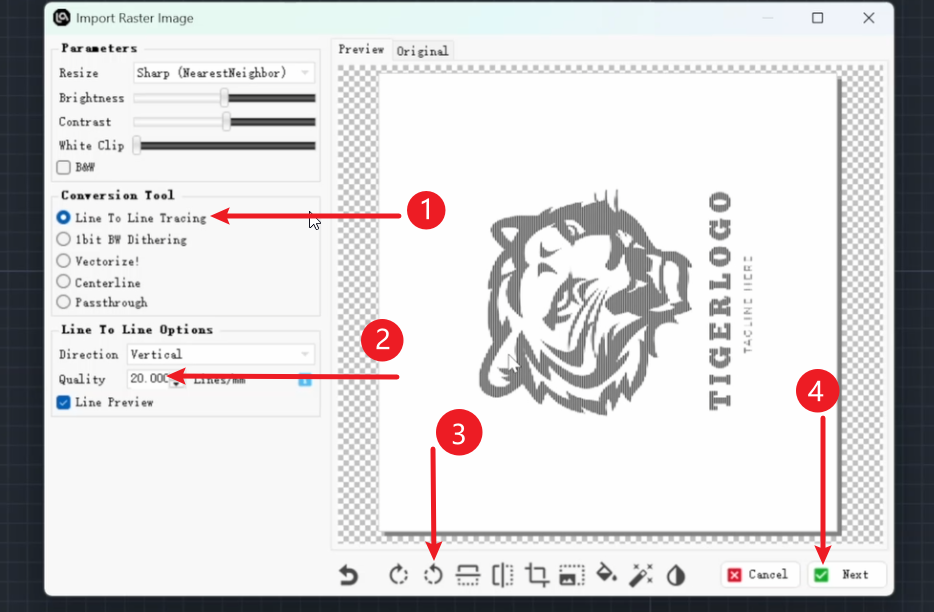
- 3.1.Select the engraving mode
- 3.2.Set the number of lines engraved within 1mm (this is related to quality and it is recommended to set it above 18)
- 3.3.Rotate the pattern 90 degrees in the direction of the cup’s angle
- 3.4.Click “Next”
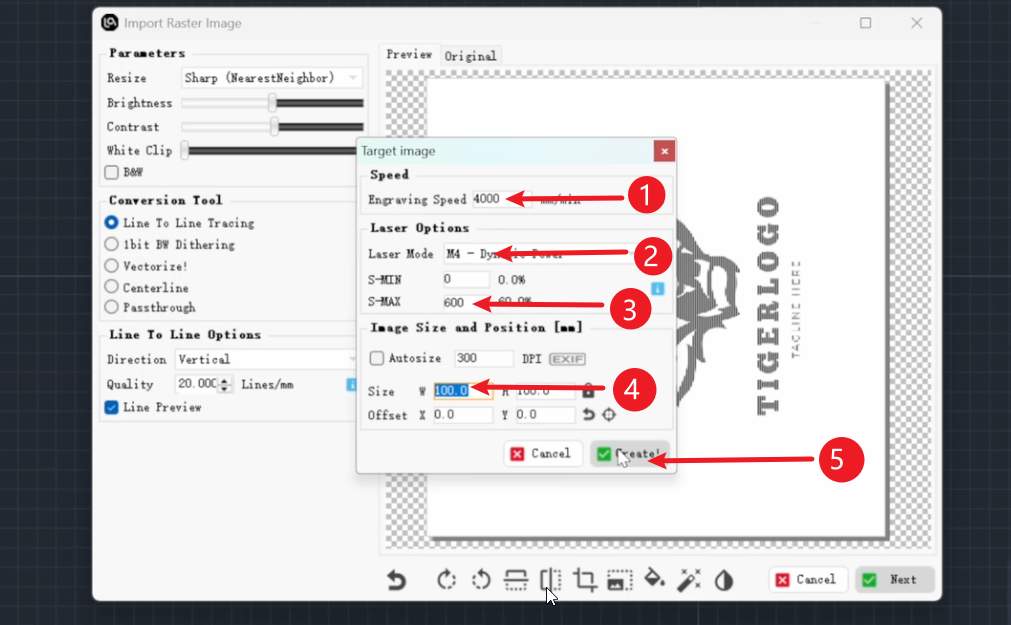
- 4.1.Set the speed of the engraving
- 4.2.Select the laser mode
- 4.3.Set the power for the engraving operation
- 4.4.Set the range of dimensions that need to be engraved
- 4.5.Click “Finish” to start the carving process.