¶ Common fault information
¶ Laser head does not come out of light how to solve?
Check the laser head connection:
-
Check whether the cable to the laser head is loose or improperly connected.
-
If the cable is loose or improperly connected, reconnect it immediately to ensure the normal operation of the laser head.
Check the functions of the laser head and fan: -
After starting the machine, please observe whether the fan on the laser head rotates normally.
-
At the same time, check whether the light of the laser head lights up when the laser is turned on (the color of the light may be blue or green for different models).
-
If the fan turns and the signal light comes on, but the laser head does not emit laser light, this may indicate that the laser head is faulty and needs to be replaced.
-
In addition, if the fan of the laser head does not turn, but the power supply of the motherboard port is normal, then the problem may be in the wiring or laser head, which needs to be further checked or replaced.
¶ What can I do if my machine cannot connect to my computer?
-
Power On Check:
- Ensure that the laser engraving machine is powered on and that the fan of the laser module is rotating to confirm that the machine is working properly.
-
USB Connection Confirmation:
- Please confirm that the USB cable is correctly connected to the machine’s interface.
-
Computer Recognition Check:
- Check if your computer can recognize the machine’s COM port signal. If necessary, try using another USB port on the computer.
-
Driver Installation:
- If no new COM port was detected in the previous step, you may need to install the CH340 driver. You can obtain this driver from the TF card files or install the CH340 driver through the lasergrbl tool.
-
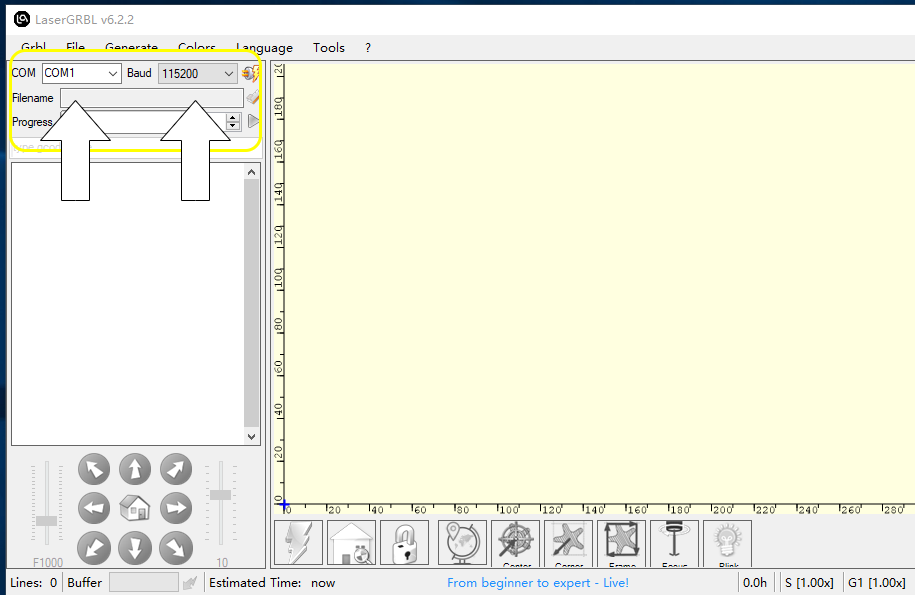
Baud Rate Setting:
- Set the correct baud rate in the software, usually 115200.
-
Port Selection:
- Select the correct COM port in the software. If you are unsure, try each available COM port.
-
Connection Operation:
- Click the “Connect” button in the software to establish communication with the machine.
-
Troubleshooting:
- If you still cannot connect after the above steps, restart your computer and repeat steps 5 to 7 without opening any other software. This helps to rule out the possibility of software conflicts.
-
Firmware Update:
- If all steps have been tried and it still fails, and the software displays a prompt message on the left side of the dialog box, you may need to update the machine’s firmware. After updating the firmware, repeat the above steps.
|
¶ How to deal with pattern split-layer after carving?
- Adjust the hexagonal column of the pulley with a wrench to ensure the wheel conforms to the track, moving smoothly without shaking. Also, ensure the X and Y axes move without getting stuck.
- The synchronous belts of the X and Y axes should be adjusted to a pre-tensioned state.
- The screws that fix the laser module must be firmly secured and not wobble.
- Check whether the motors on both sides of the Y-axis are working properly; you can unplug the motor wire on one side for verification.
- Reduce the operating speed appropriately.
- Inspect whether the wheels show signs of wear or if there are any foreign objects in the tracks.
- If the above steps do not resolve the issue, refresh the machine’s firmware. (The machine models in the links may vary, but the operation method is the same)
- If the ambient temperature is high, use a fan for cooling around the mainboard.
¶ How to Deal with the Carving Process Being Interrupted Suddenly?
-
Change USB Port:
- If you encounter connection interruptions, try changing the USB port on your computer. A loose connection or insufficient voltage may lead to unstable connections.
-
USB Cable Management:
- Ensure that the USB cable is placed where it will not be touched or pulled. Improper cable management, such as accidentally pulling the USB cable, can also lead to connection interruptions.
-
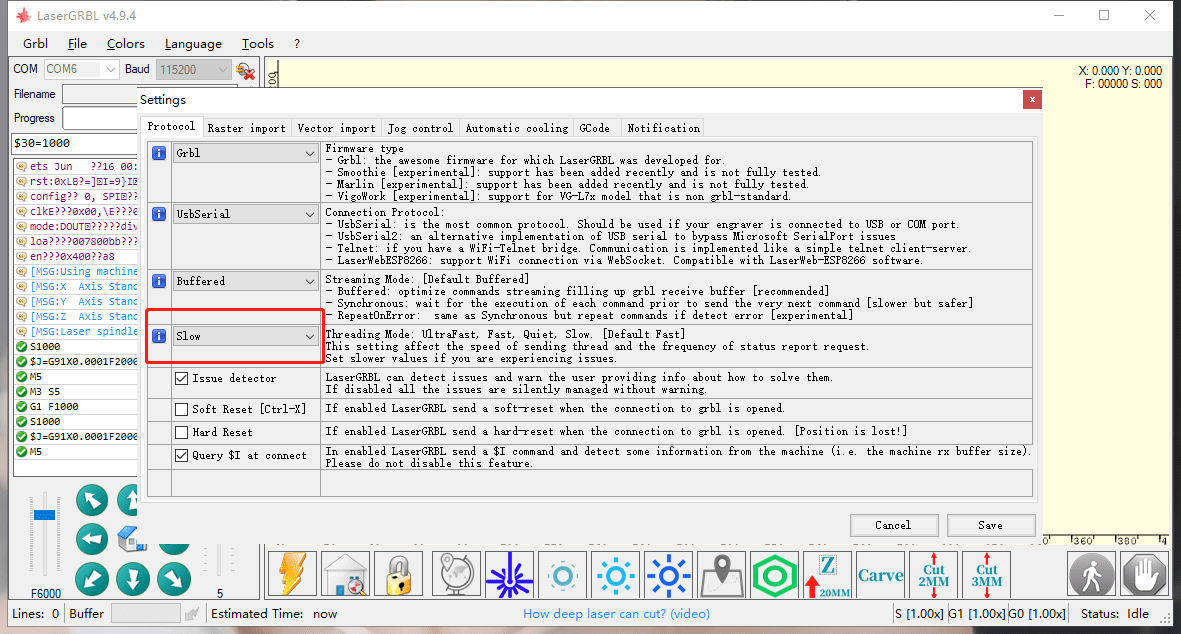
Adjust Software Settings:
- In the laserGRBL software, check the “Threading Mode” settings and select a lower-speed mode to improve stability. (Refer to 3.1png and 3.2png in Link 1)
-
Update Machine Firmware:
- If the above steps do not resolve the issue, you may need to update the machine’s firmware. (Refer to the video in Link 2)
- Please note that although the machine firmware in the video may differ from your machine, the steps to update the firmware are consistent. Please contact us to obtain the firmware suitable for your machine.
¶ How to Deal with the Engraved Pattern Being Inverted?
-
Axis Movement Test:
- First, manually move the X and Y axes and carefully observe whether their movement directions are as expected.
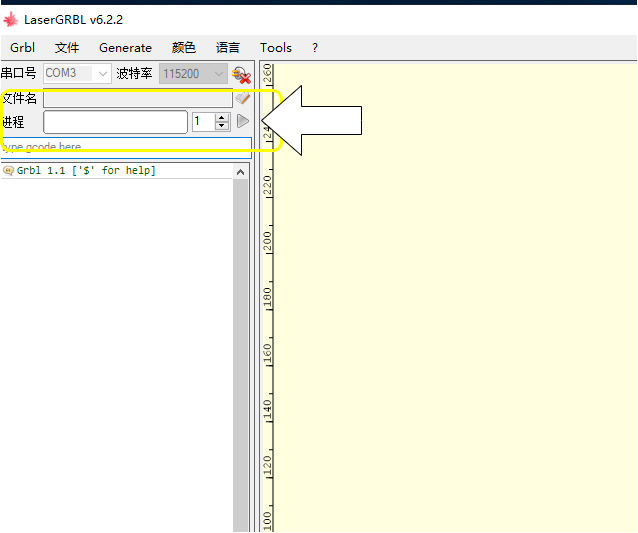
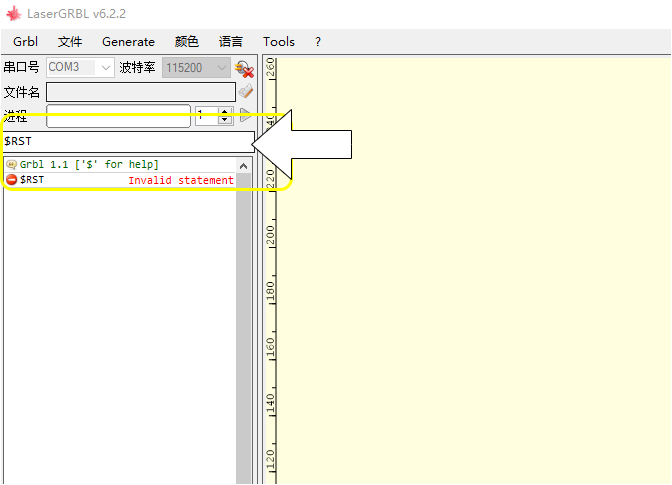
- If the movement direction is incorrect, open the LaserGRBL software, enter
$RSTin the “type gcode here” input box, and then press the “Enter” key on the keyboard. This will reset the machine to its default settings. Afterwards, please conduct movement and engraving tests again to verify if the problem has been resolved. (Refer to 1.png in Link 1)
-
Firmware Update:
- If the problem still persists after the above steps, you may need to update the machine’s firmware. (Refer to the video in Link 2)
- Please note that although the machine firmware shown in the attached video may differ from your machine, the steps to update the firmware are universal. Please contact us to obtain the firmware suitable for your machine model and follow the video guidance to update.
¶ How to Deal with the Inability to Achieve Grayscale Effects in Engraving?
-
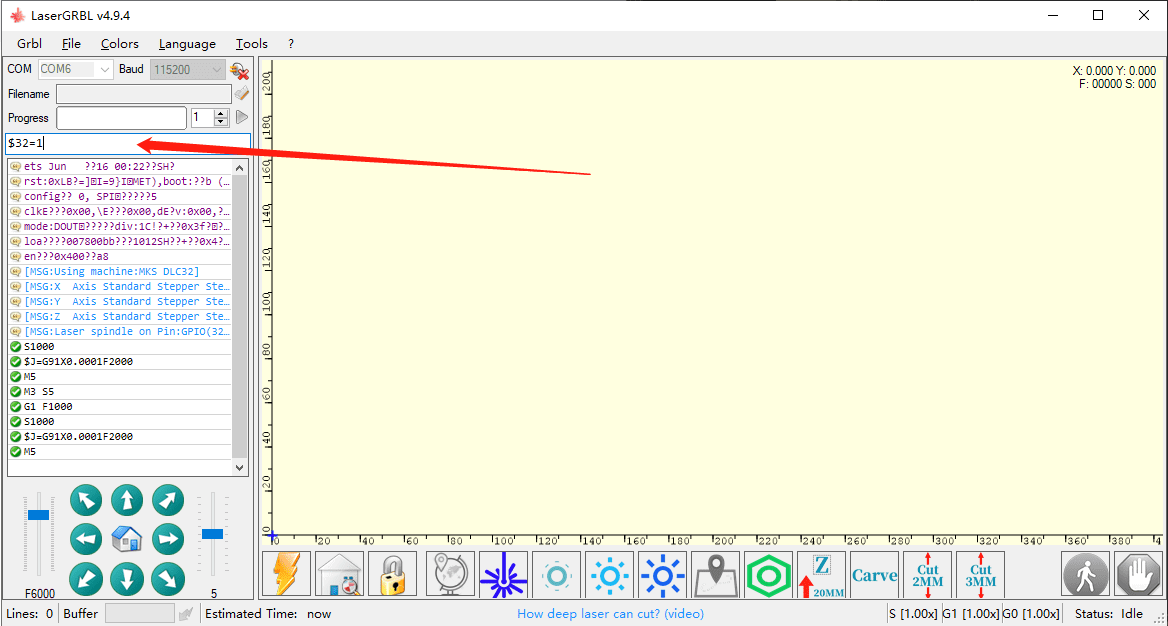
Enable Engraving Mode:
- In the LaserGRBL software’s “type gcode here” input box, enter
$32=1, then press the “Enter” key on the keyboard. This will enable the engraving mode, preparing for the subsequent engraving tasks. (Refer to 1.png in the link)
- In the LaserGRBL software’s “type gcode here” input box, enter
-
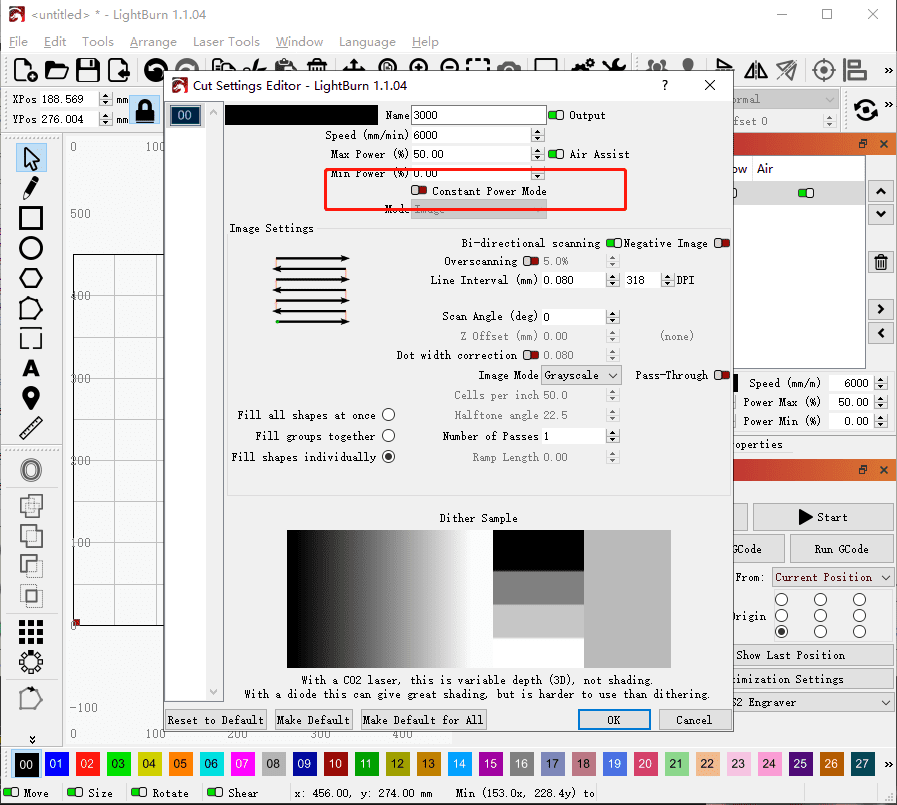
Select Engraving Mode:
- In the laserGRBL software, choose the M4 mode. Also, in the Lightburn software, ensure to disable “Constant Power Mode”.
- The M4 mode is suitable for engraving as it offers finer control, making it ideal for engraving operations. (Refer to 2.png in the link)
-
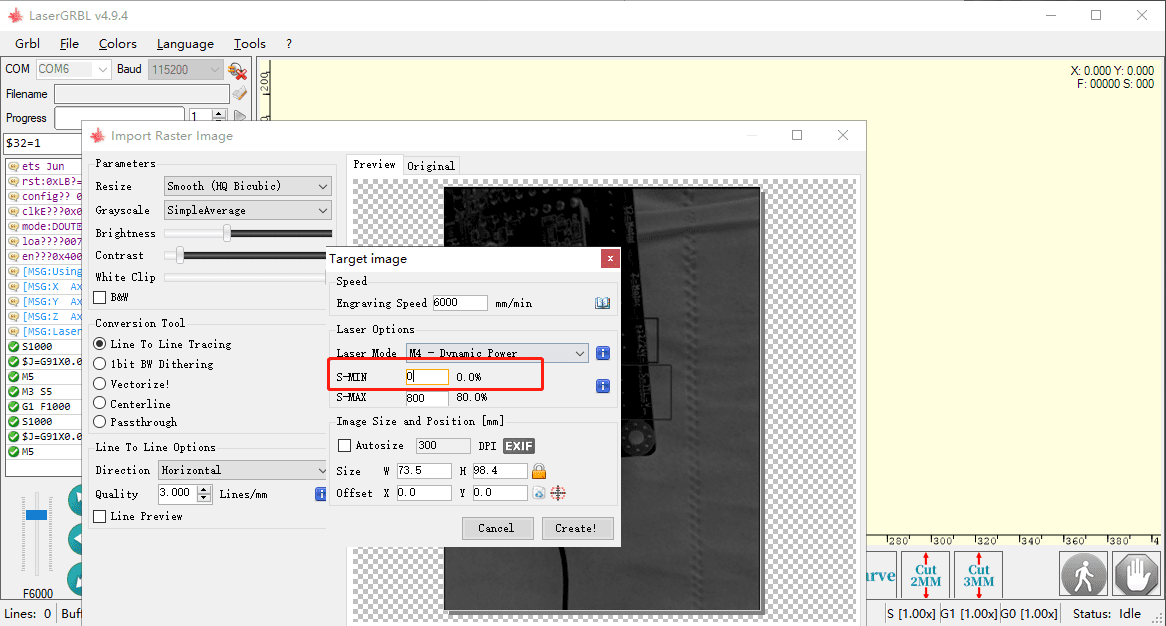
Set Minimum Power:
- In both laserGRBL and Lightburn software, ensure that the minimum power S value does not exceed 10% to prevent over-engraving or material damage. (Refer to 3.png in the link)
-
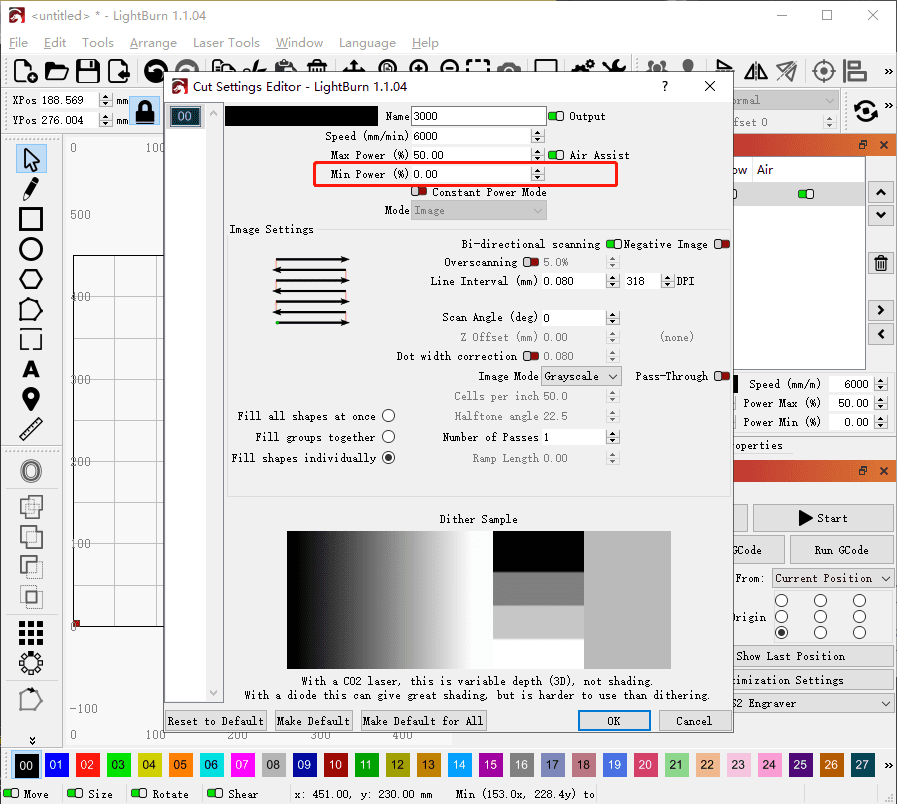
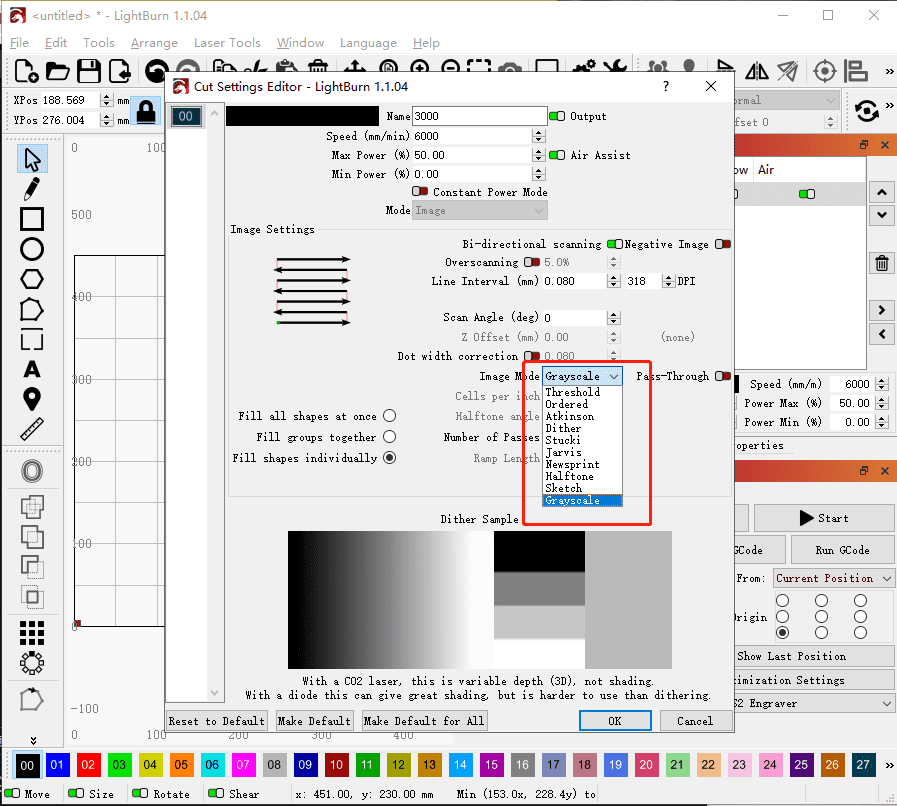
Choose Grayscale Mode:
- In the Lightburn software, set the image mode to grayscale. Grayscale mode can help you control the engraving depth and power more precisely, leading to better engraving results. (Refer to 4.png in the link)

¶ How to Deal with the Machine Axis Moving in the Opposite Direction?
-
Connect the Machine:
- Ensure that the computer has been successfully connected to the laser engraving machine.
-
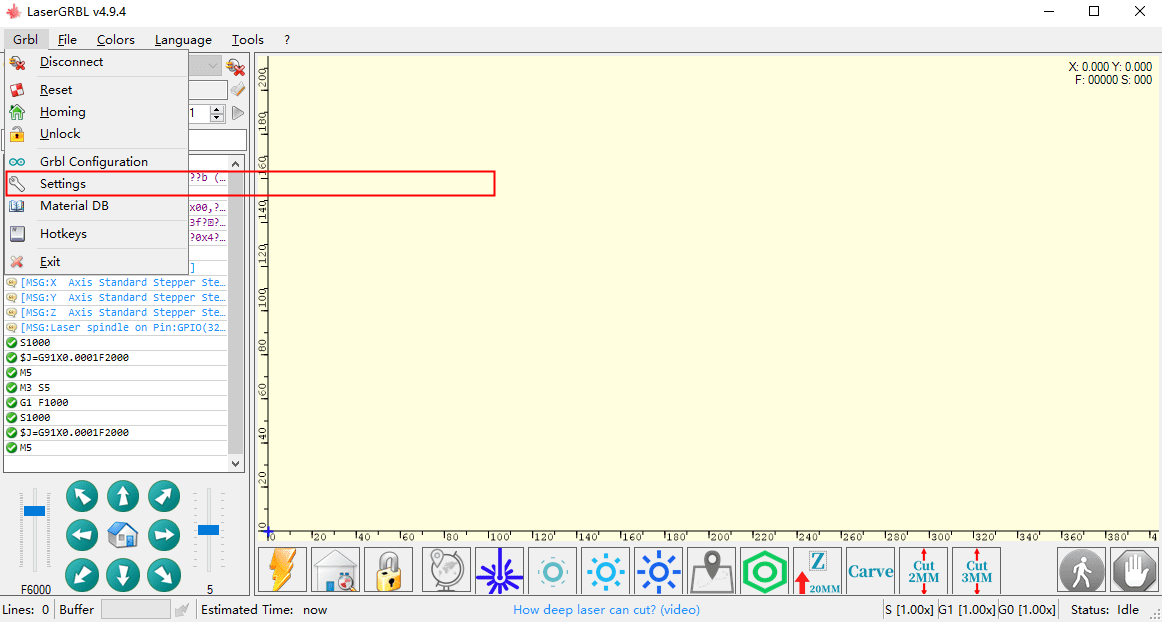
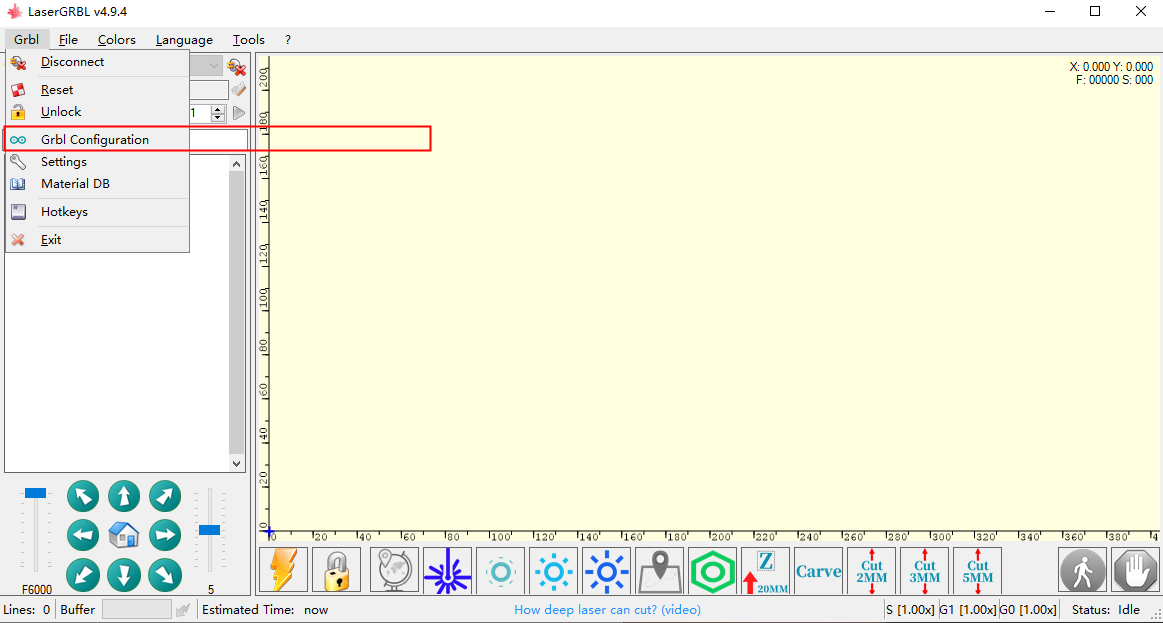
Access GRBL Configuration:
- In the lasergrbl software, click on the “GRBL” option, then select “GRBL Configuration” to enter the configuration interface.
-
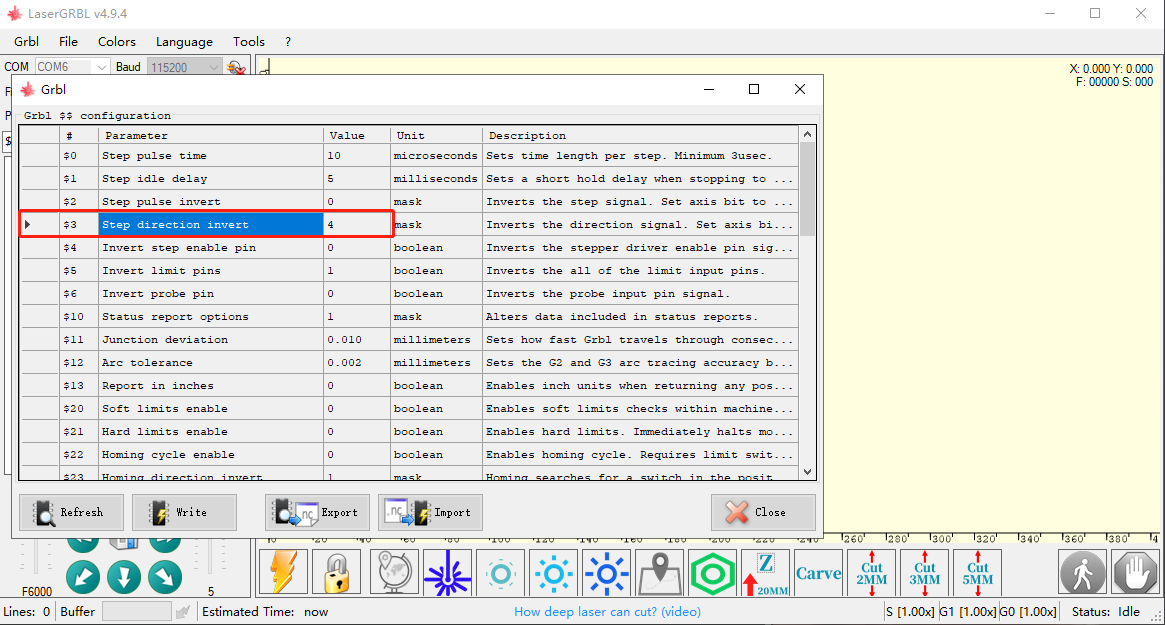
Adjust Motion Control Settings:
- In the configuration interface, locate the parameter
$3. This parameter controls the machine’s motion control mode. - Change the value of
$3to any of the options0,1,2, or3.
- In the configuration interface, locate the parameter
-
Save Settings and Restart:
- After modifying the parameter value, click “Write” to save the changes.
- Once the saving is complete, restart the machine to apply the new settings.
-
Test Axis Movement:
- Example operation process:
- Follow the steps above to set
$3to0, click “Write,” then restart the machine. - Connect the machine and use the lasergrbl software to move the X and Y axes, observing whether the movement direction is correct.
- If the direction is incorrect, modify the value of
$3to1again and retest the axis movement. - Continue to modify the value of
$3to2and3in sequence until the correct axis movement direction is found.
- Follow the steps above to set
- Example operation process:
-
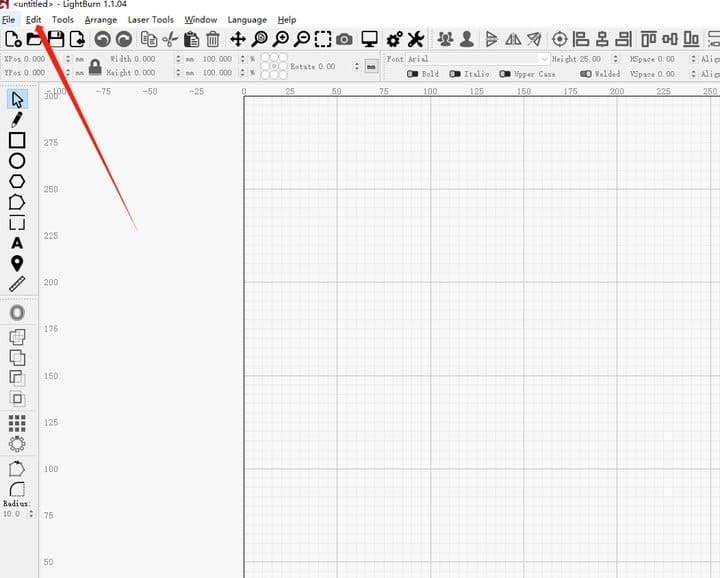
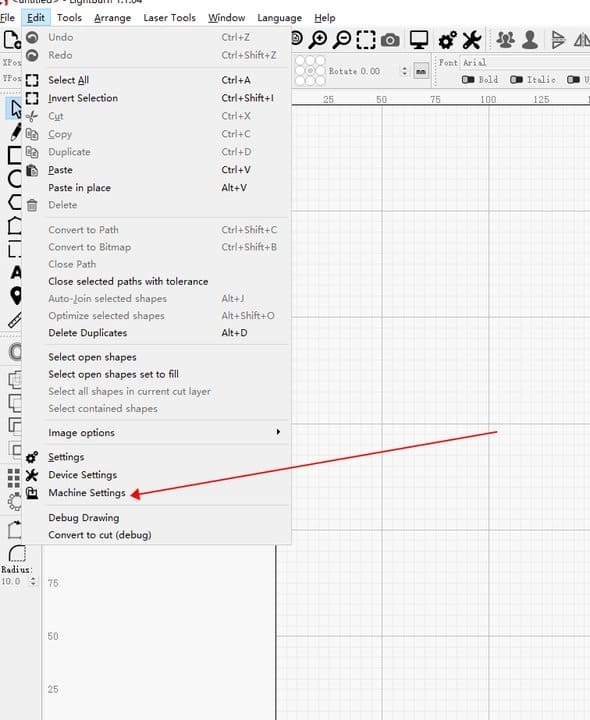
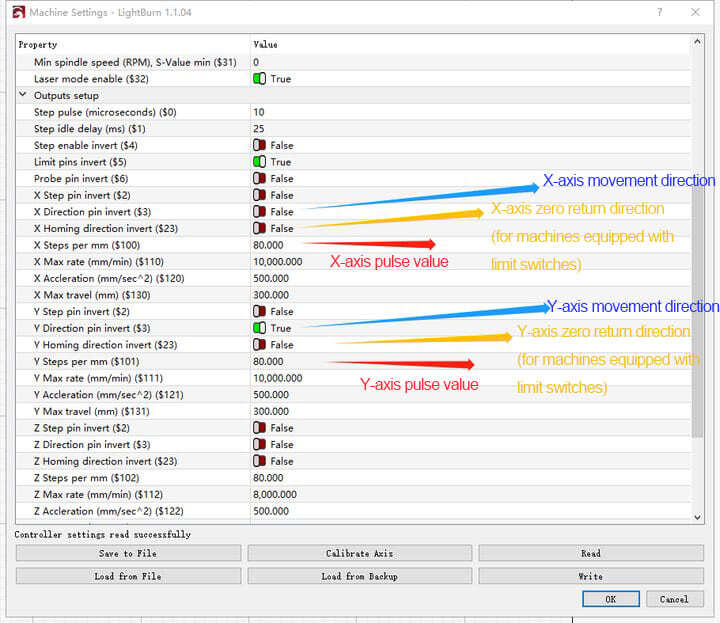
LightBurn Software Settings:
- Connect the machine in the LightBurn software and open the machine settings interface.
- Find the corresponding parameter value according to the LightBurn interface and make the appropriate modifications (for details, see Link 2).
- Configure GRBL Settings in laserGRBL:
- Adjust LightBurn software Settings: