¶ Carving execution
This tutorial explains the process of performing the carving after the preparatory work is completed (ignoring the differences in models, the operation interface and steps are all the same)
¶ Screen alignment
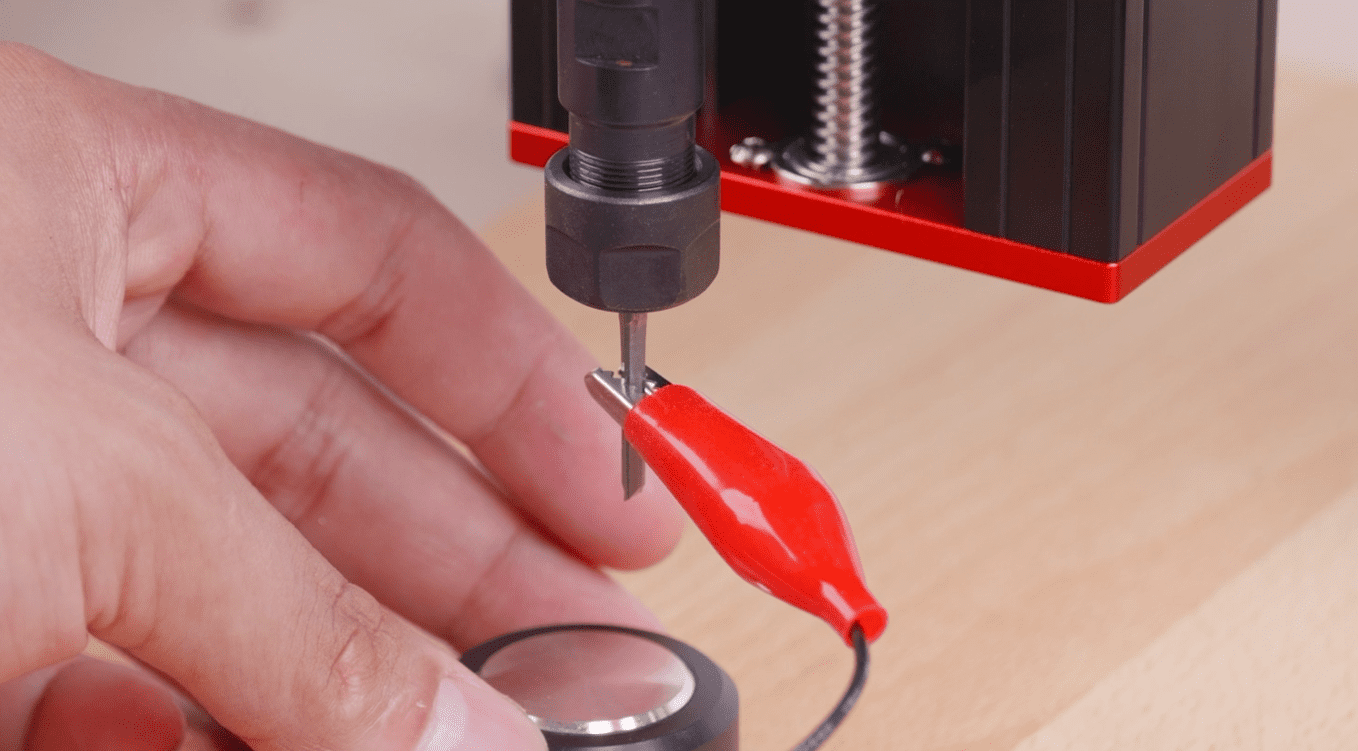
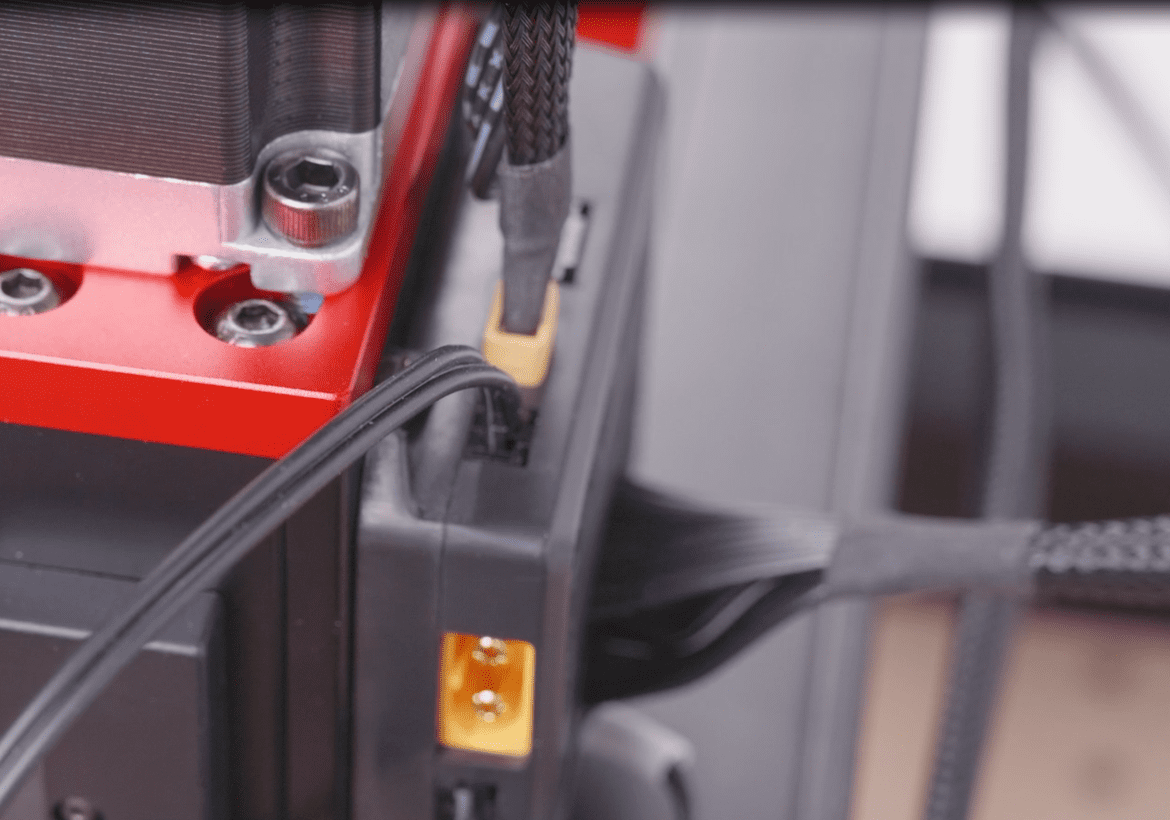
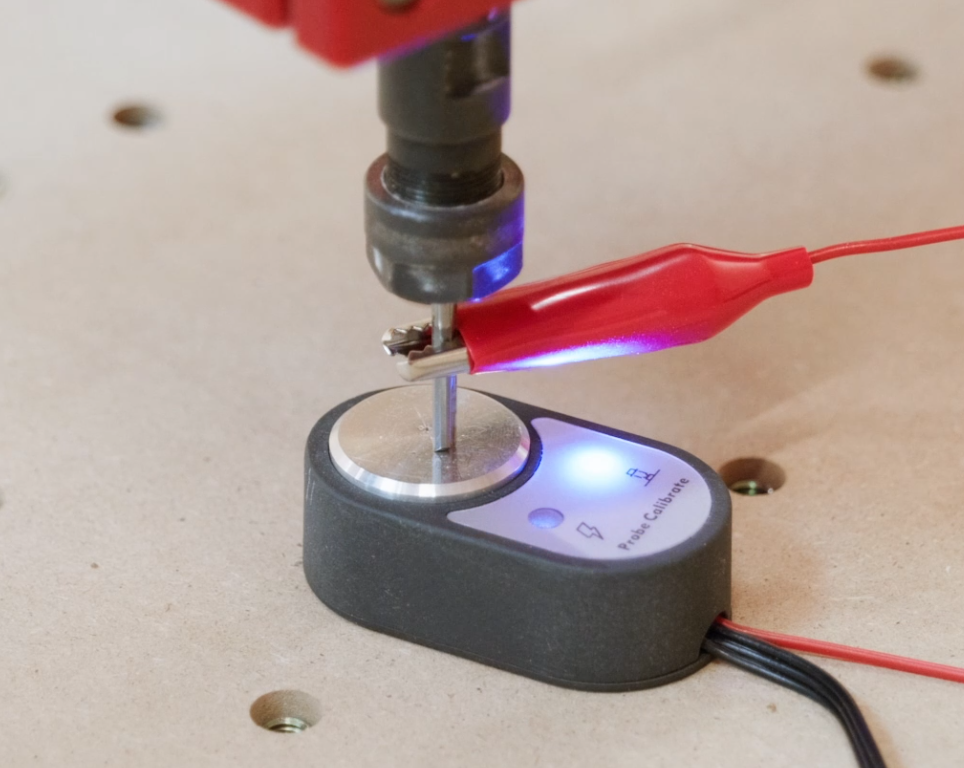
- 1.Attach the wire clamp with a hook on the cutter block to the milling cutter, and connect the other end of the straight wire to the adapter plate.
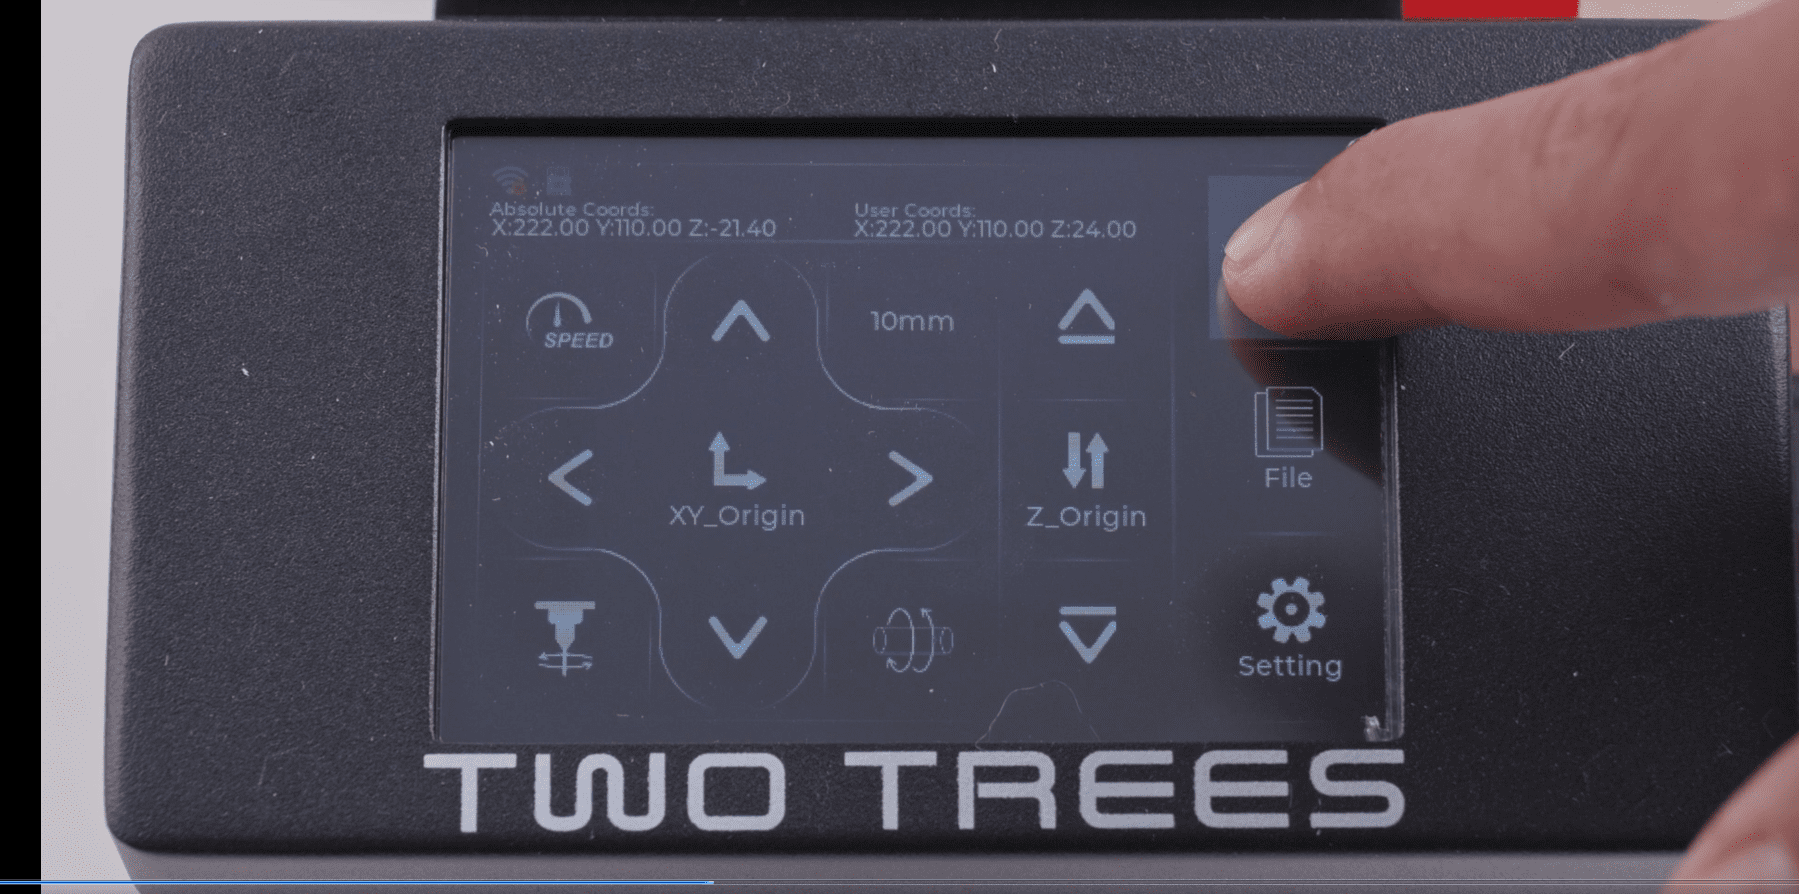
- 2.Click on the operation screen to calibrate the tool position.
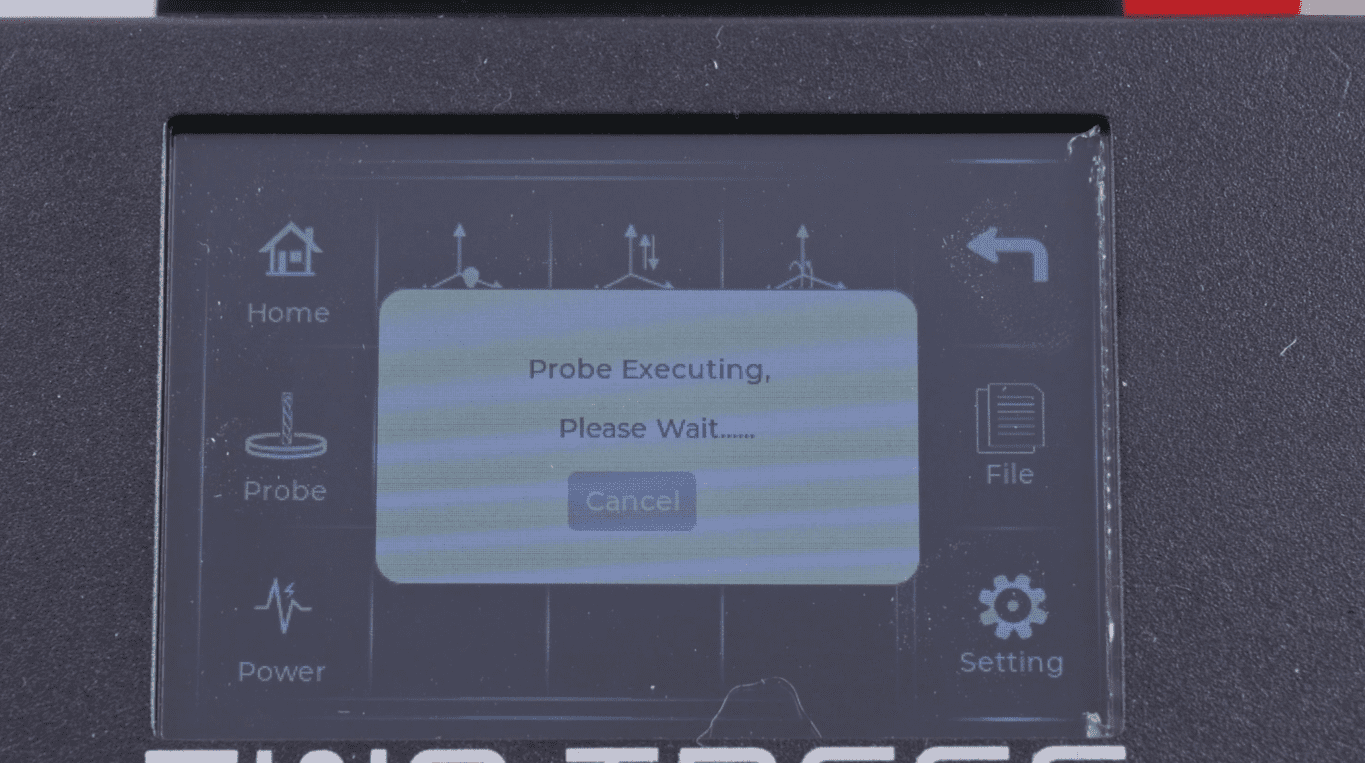
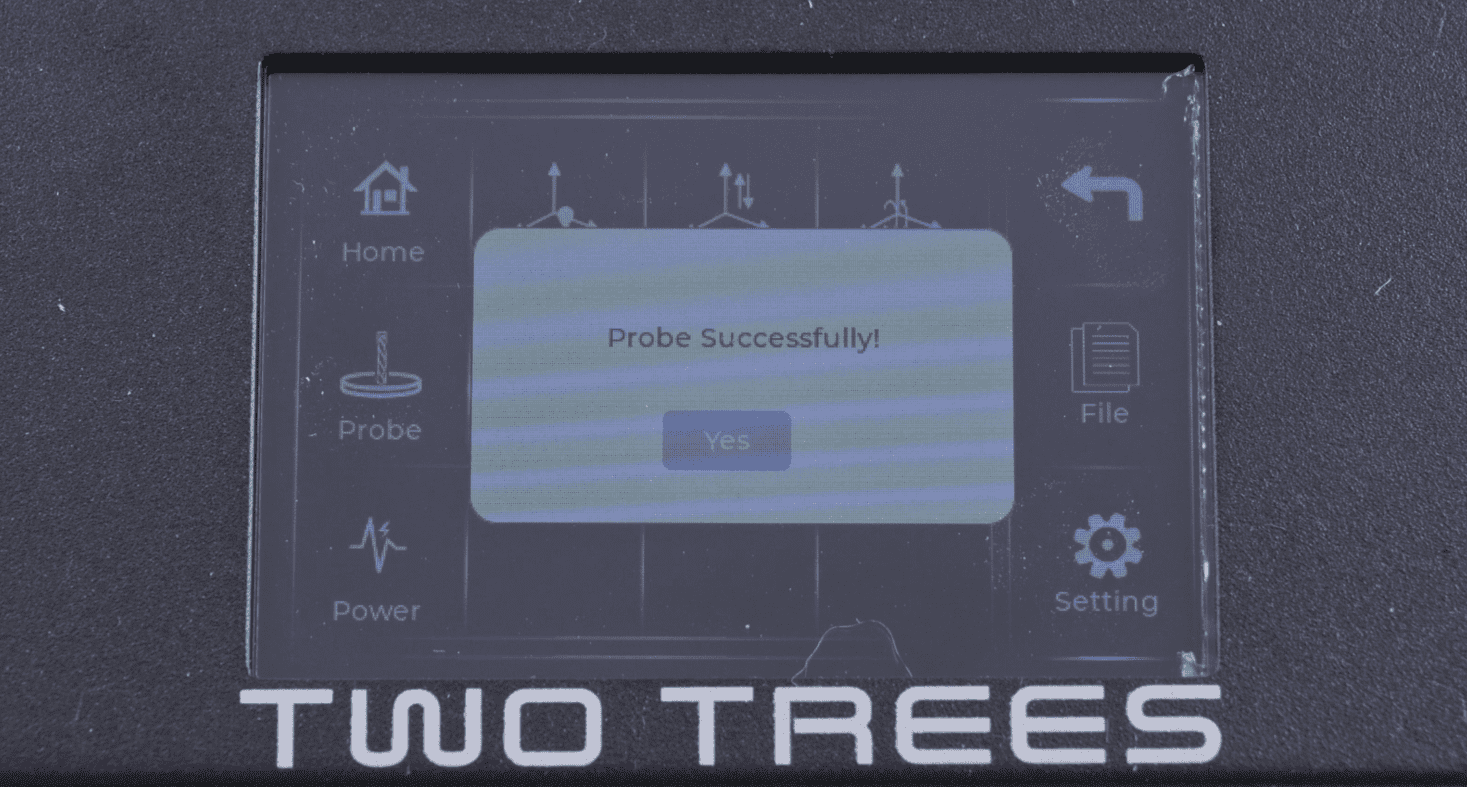
- 3.Wait until the milling cutter has lowered and completed the alignment process. Then click “Yes” on the screen, and proceed to execute the file for the engraving.
¶ Method Two
- The spindle can be manually moved. After the cutting tool reaches the required working position and the tip is pressed against the material surface, click “Position” in the operation panel’s tools to record this position as the origin. Start working from here. Then, click “File” to perform the engraving task.

|