¶ How to carve images
This chapter explains how to carry out the entire process of processing a carving file. The file can be in formats such as png, jpg, svg, etc.
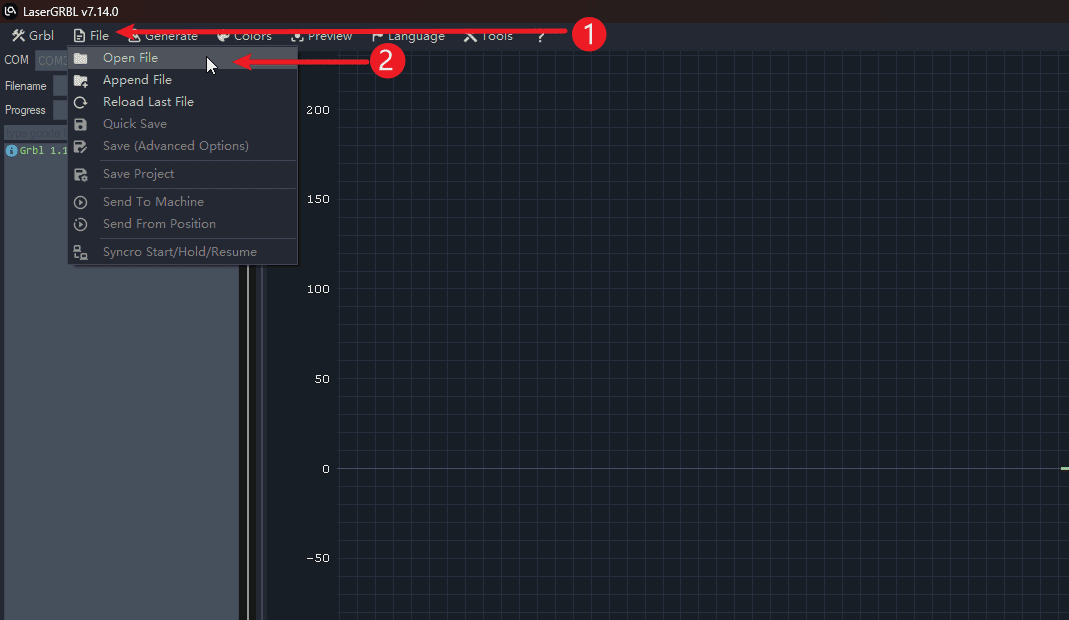
Step 1 (Perform the operations in the order indicated)
- 1.Click on the file
- 2.Click to open the file and select the image file that needs to be engraved.
|
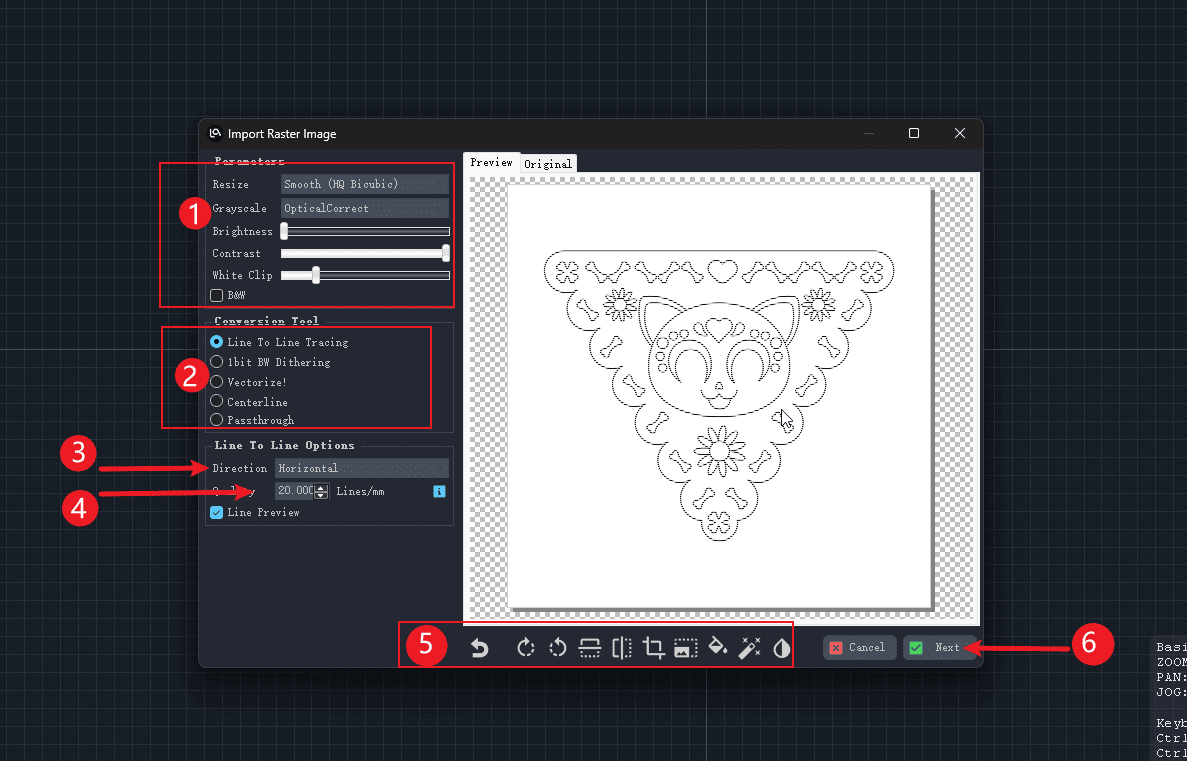
Step 2 (Perform the operations in the order indicated)
- 1.The image settings bar allows you to adjust the display of the image or use the default settings.
- 2.The mode selection for the engraving can usually be done by choosing the first one.
- 3.Set the placement direction of the image
- 4.Set the engraving quality (determine how many light rays to use for filling within the range of 1mm)
- 5.Image editing toolbar
- 6.Click “Next”
|
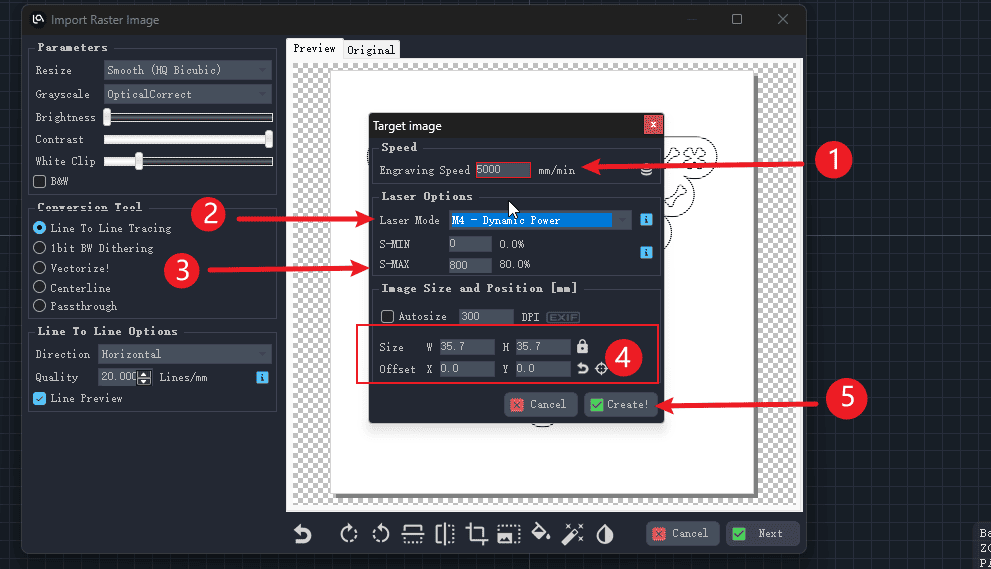
Step 3 (Perform the operations in the order indicated)
- 1.Set the speed of the engraving (This needs to be adjusted according to the available machine. Do not input the values as shown in the diagram.)
- 2.Set the laser mode for engraving
- 3.Set the laser intensity to 1000, which is equivalent to full power for engraving.
- 4.Set the size of the image to be engraved
- 5.Click to generate the file
|
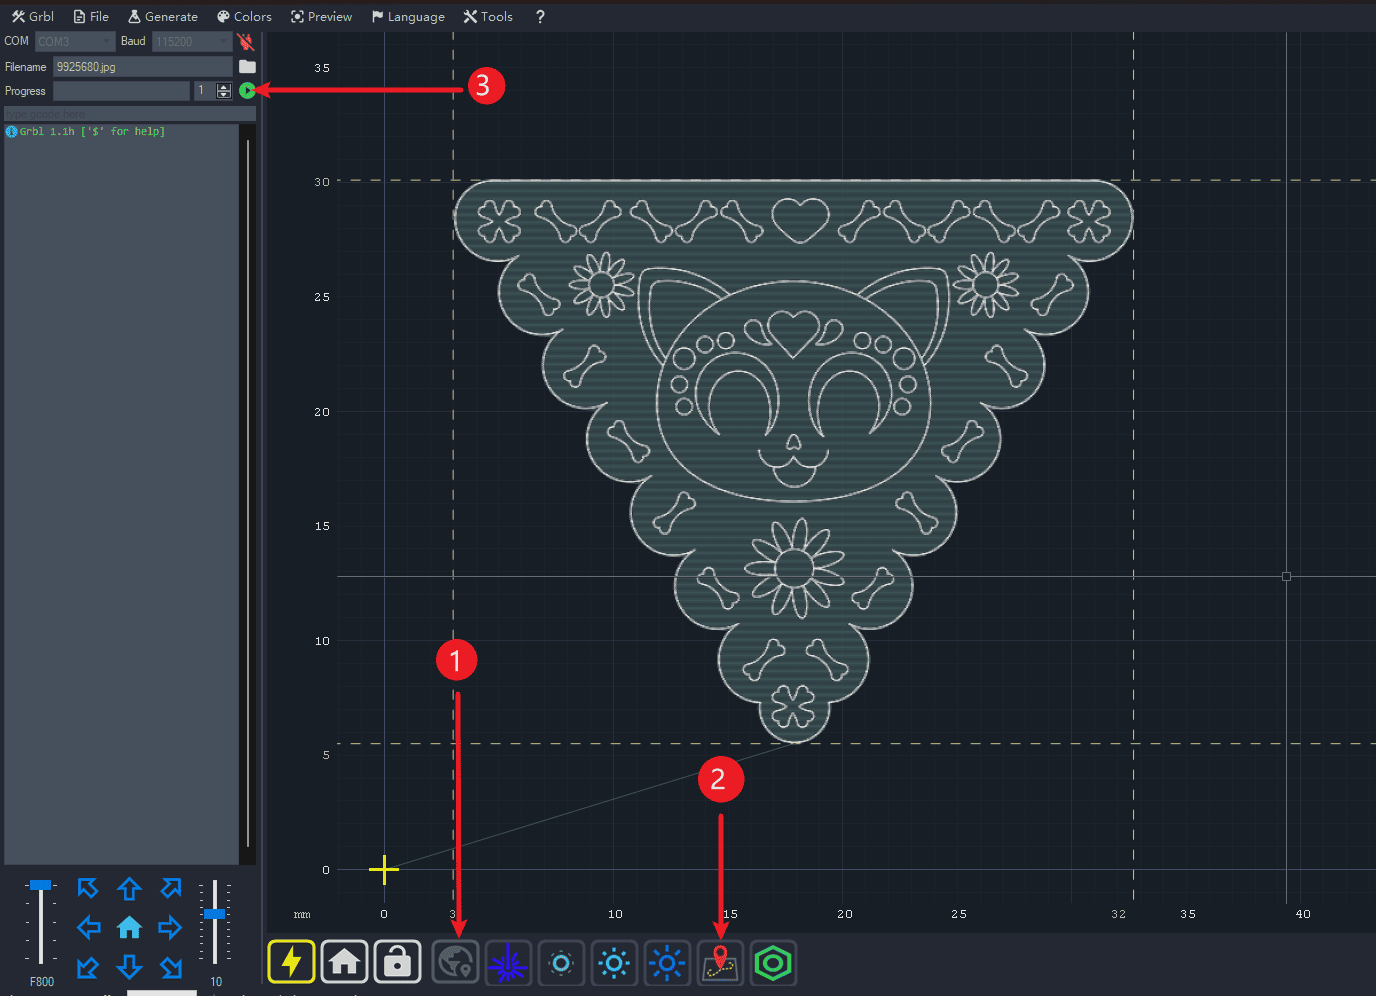
Step 4 (Perform the operations in the order indicated)
- 1.Click to position to determine the starting point of the engraving
- 2.Click to check if the engraving area is appropriate.
- 3.Click to engrave.
|